|
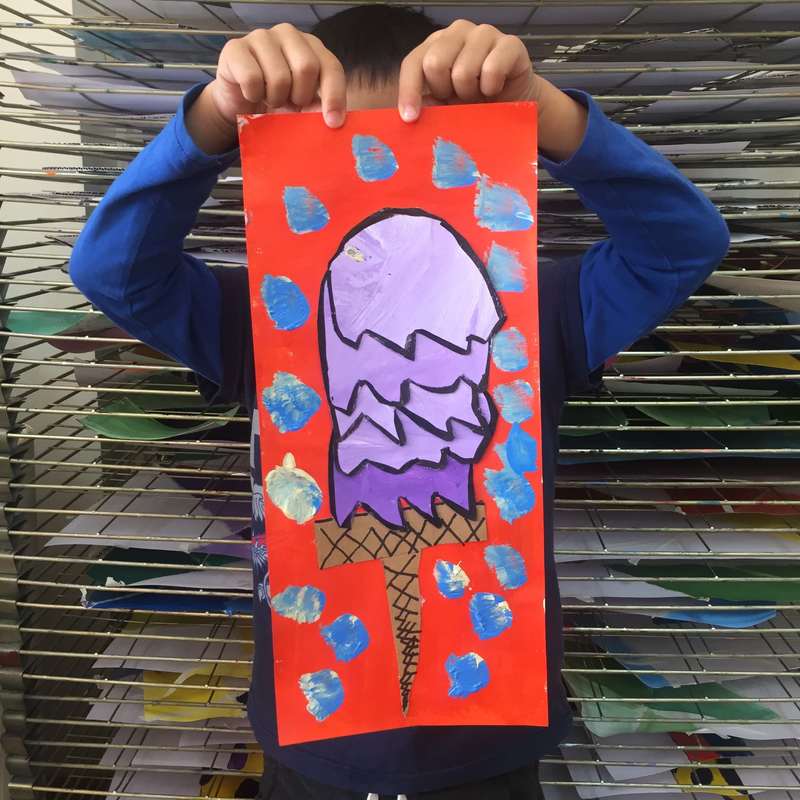
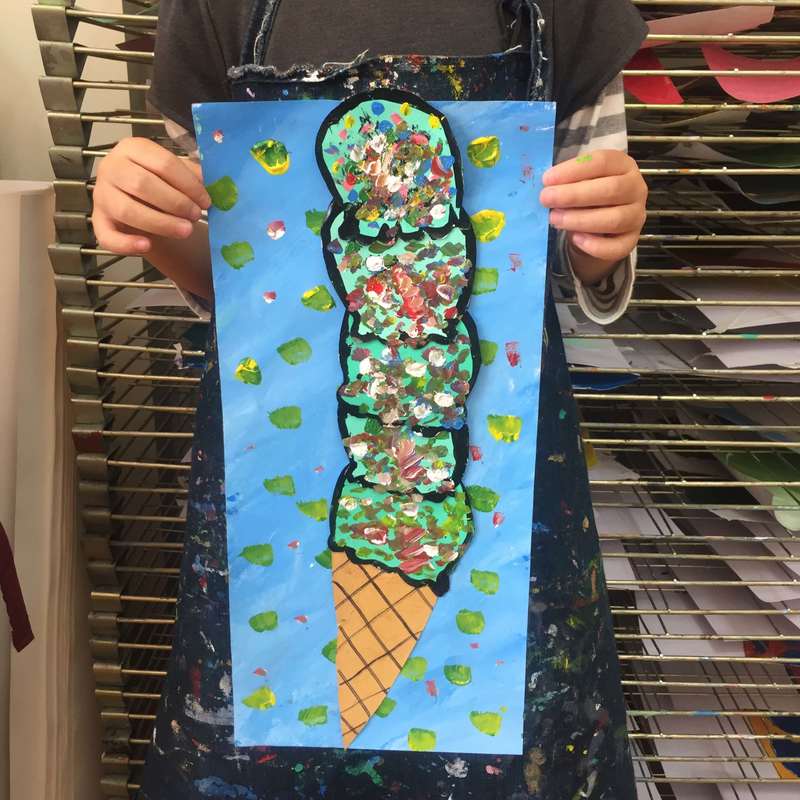
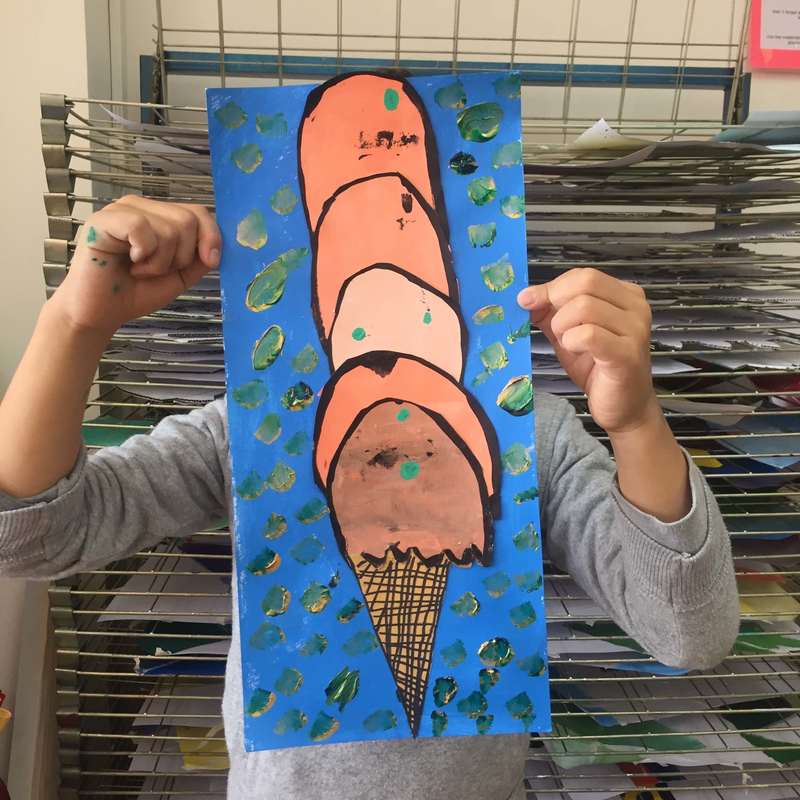
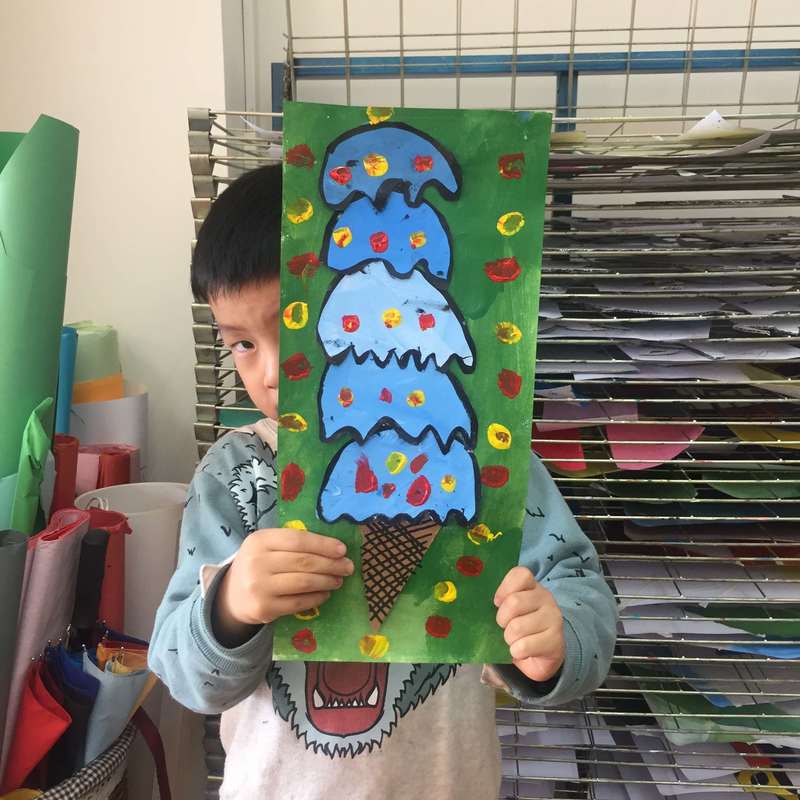
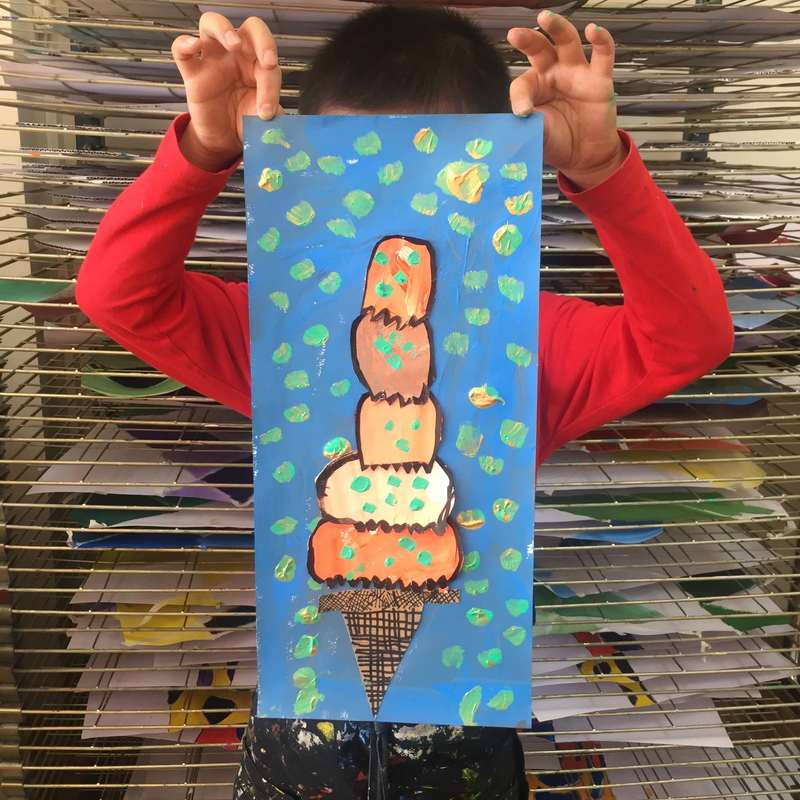
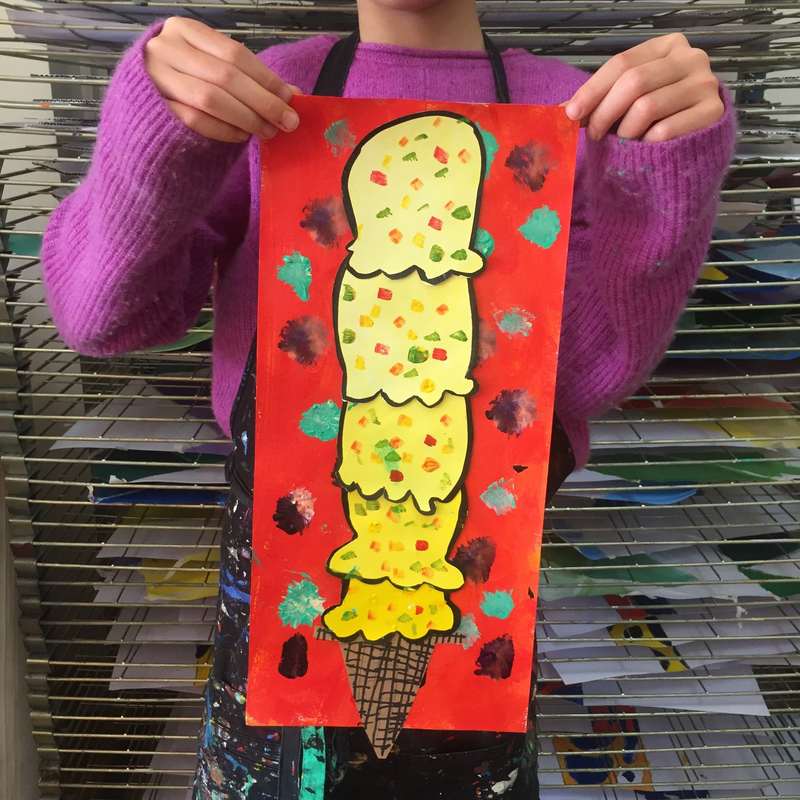
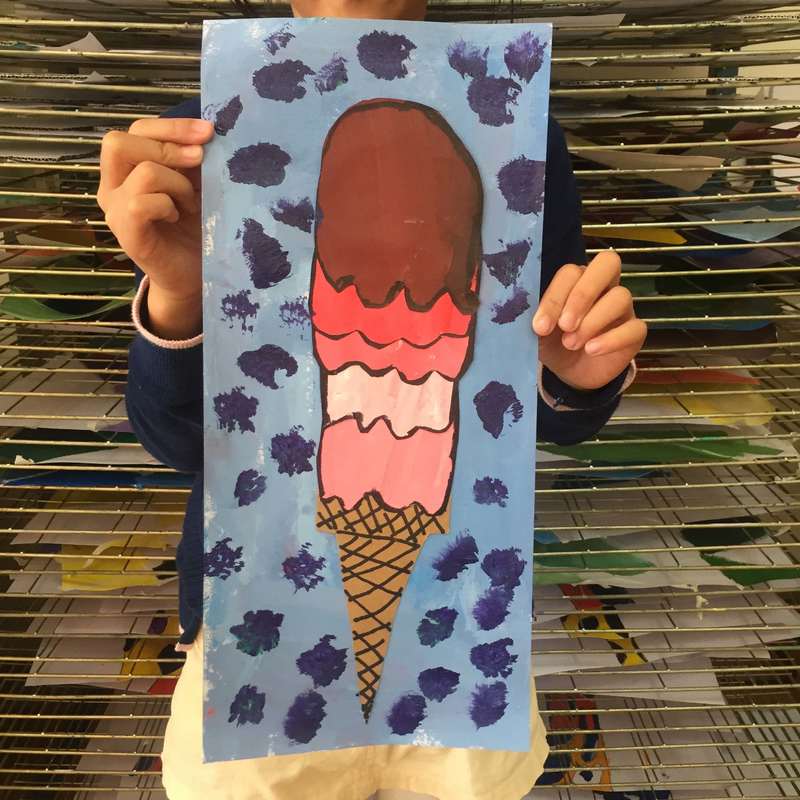
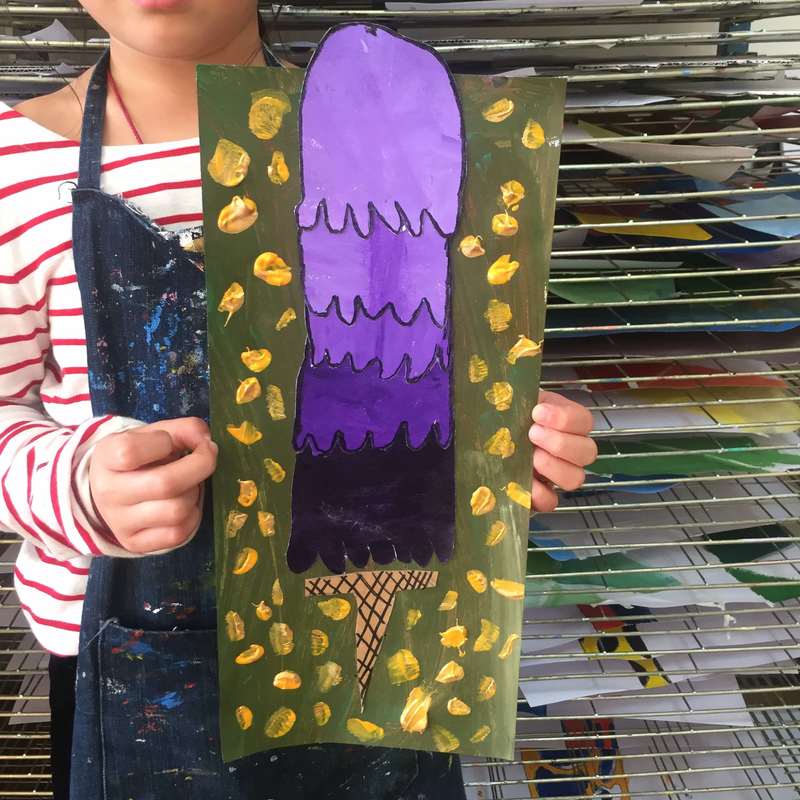
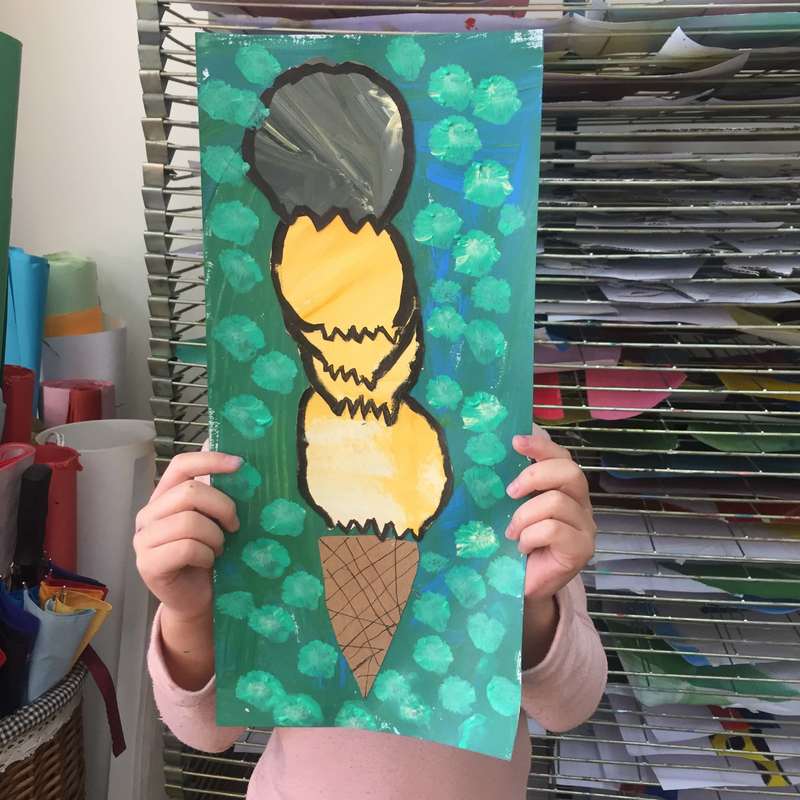
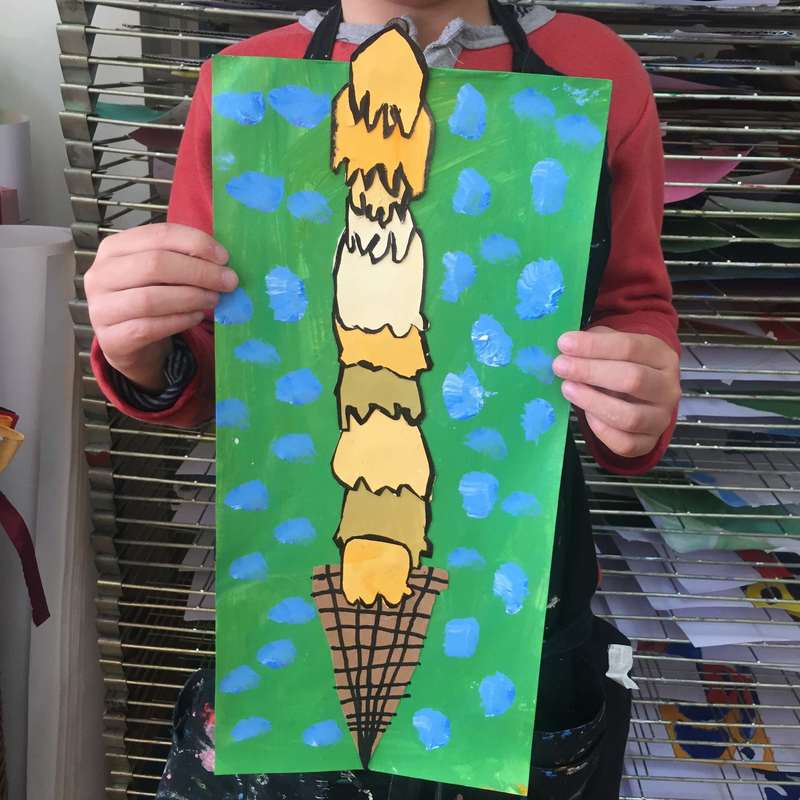
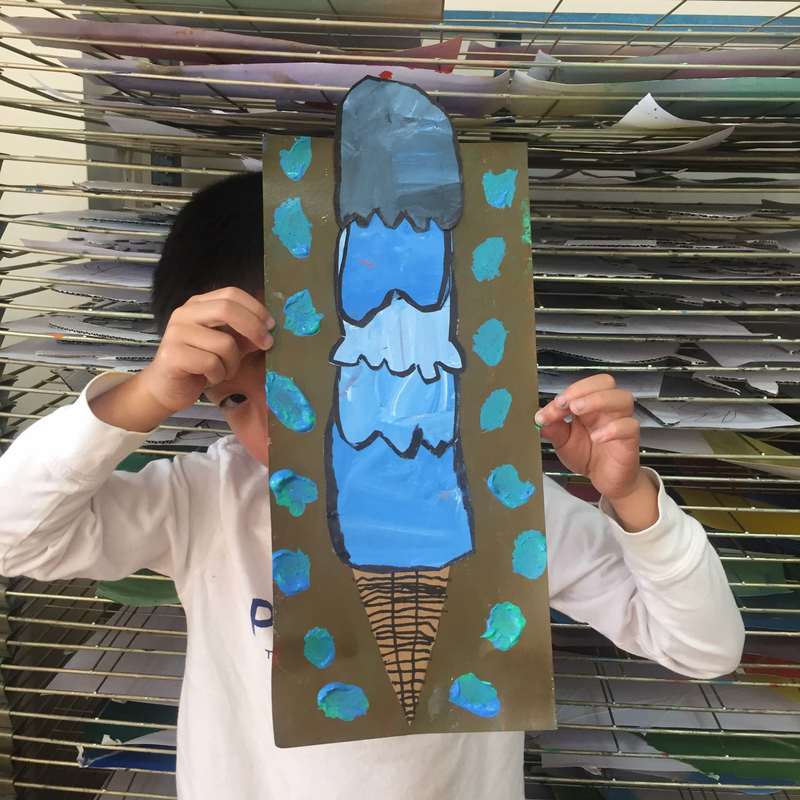
Our Grades 1 were talking about how we tint and shade a colour. After discussion we ended up making these yummmmy 5 and 6 scoops ice creams!!
0 Comments
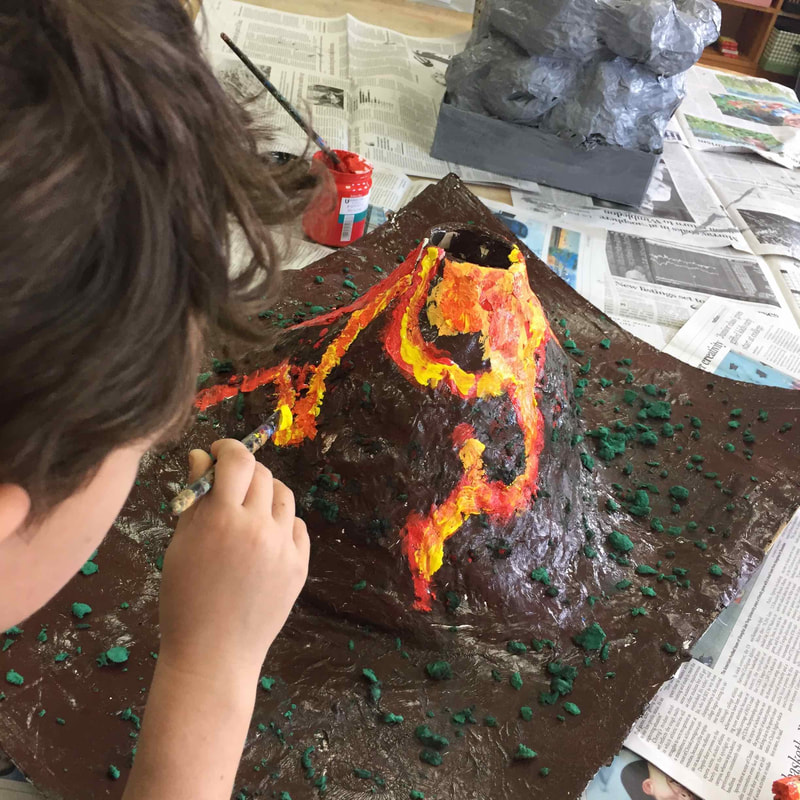
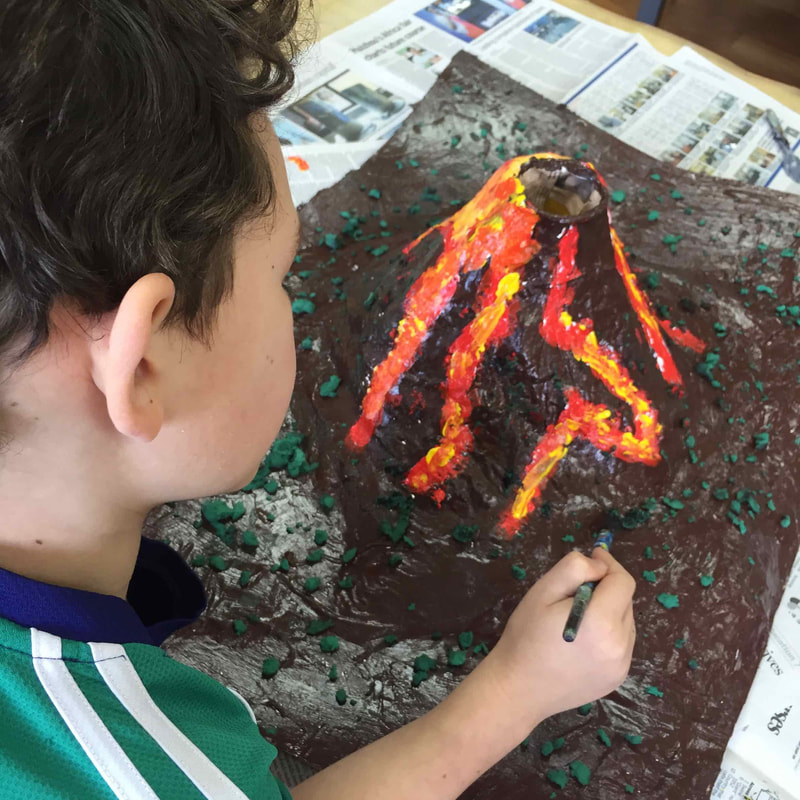
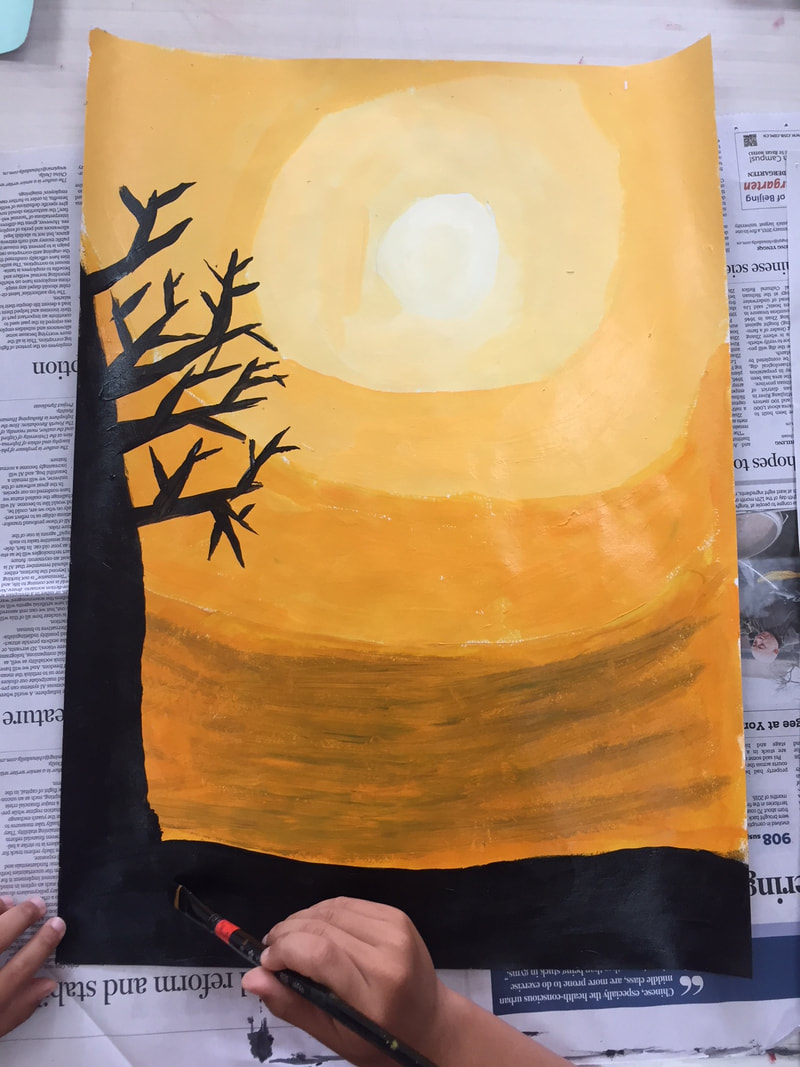
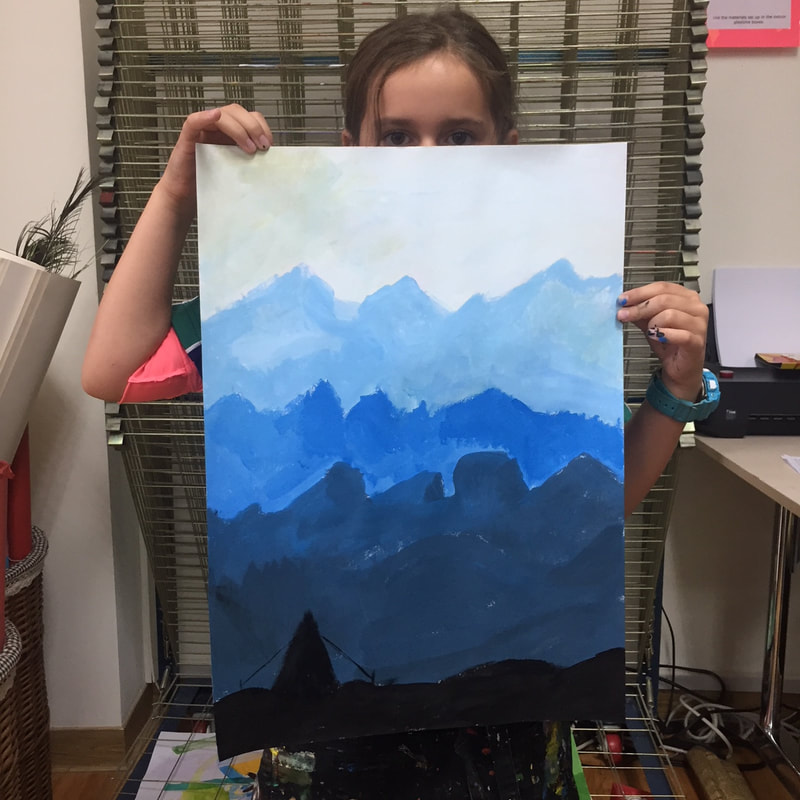
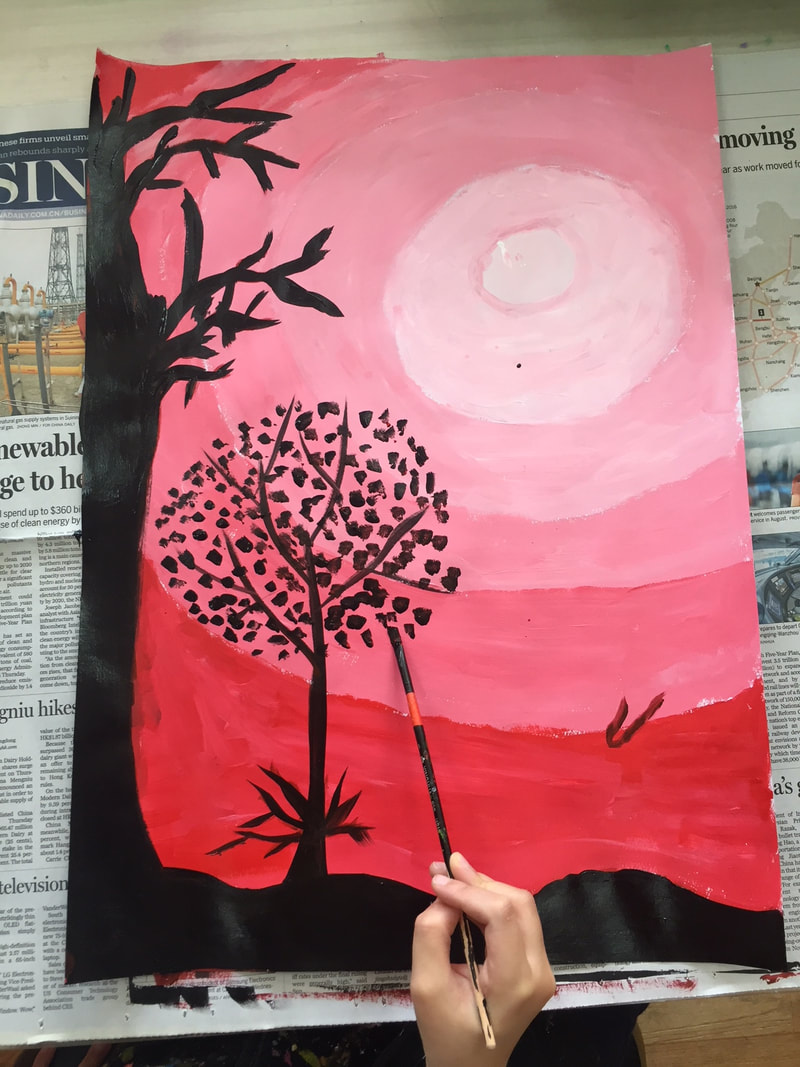
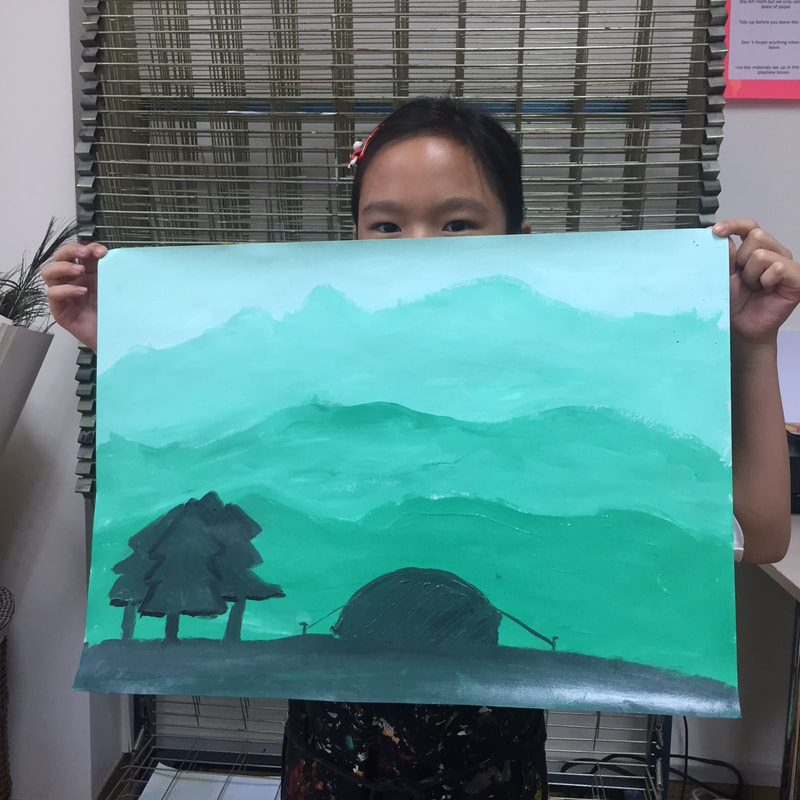
Interest fair week! Henry is sooo into volcanos so we (he) made it happen. Paper mache and acrylic. 4th graders have been working with colours during last lessons. We learned in-depth, among other things, the relation between the colours themselves in the colour wheel and also new vocabulary. This project was about tinting and shading.
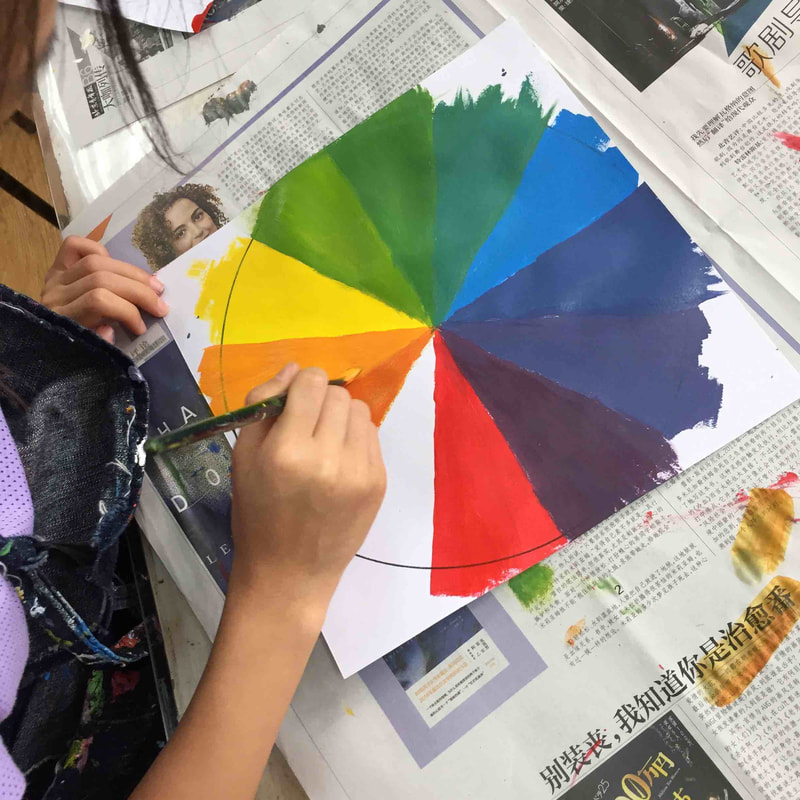
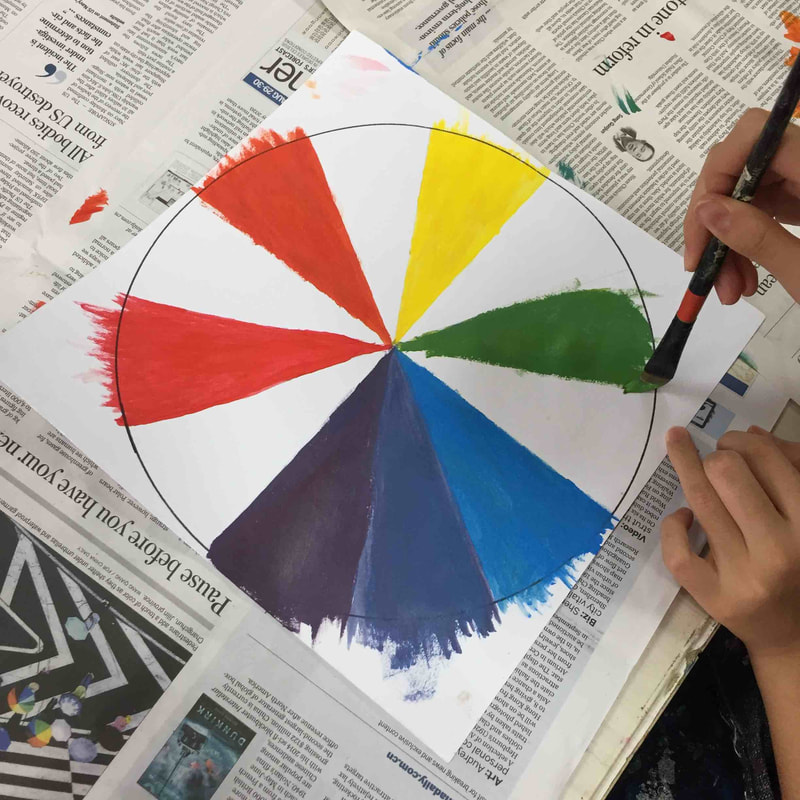
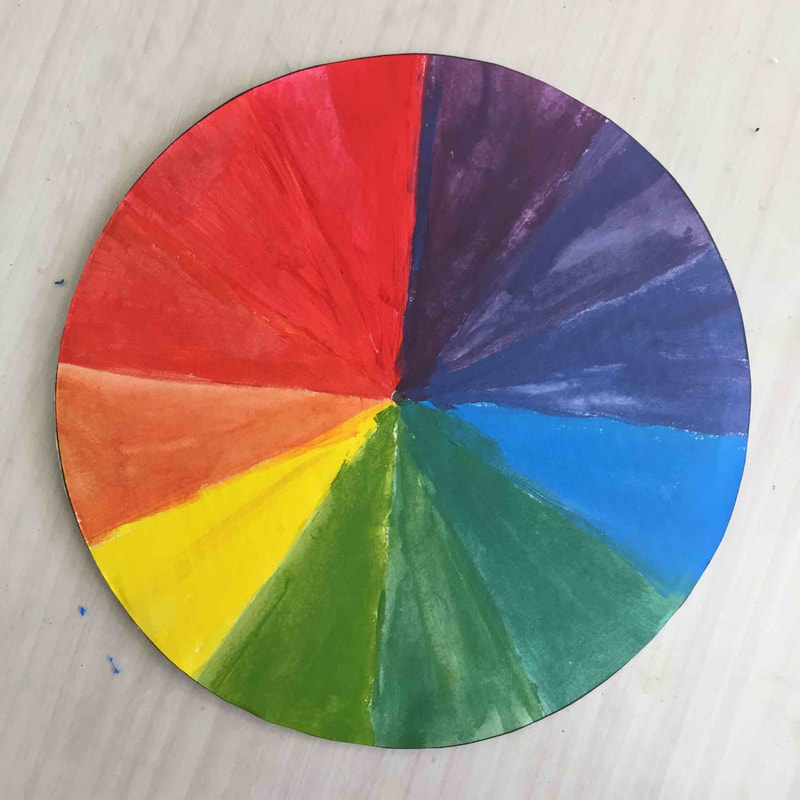
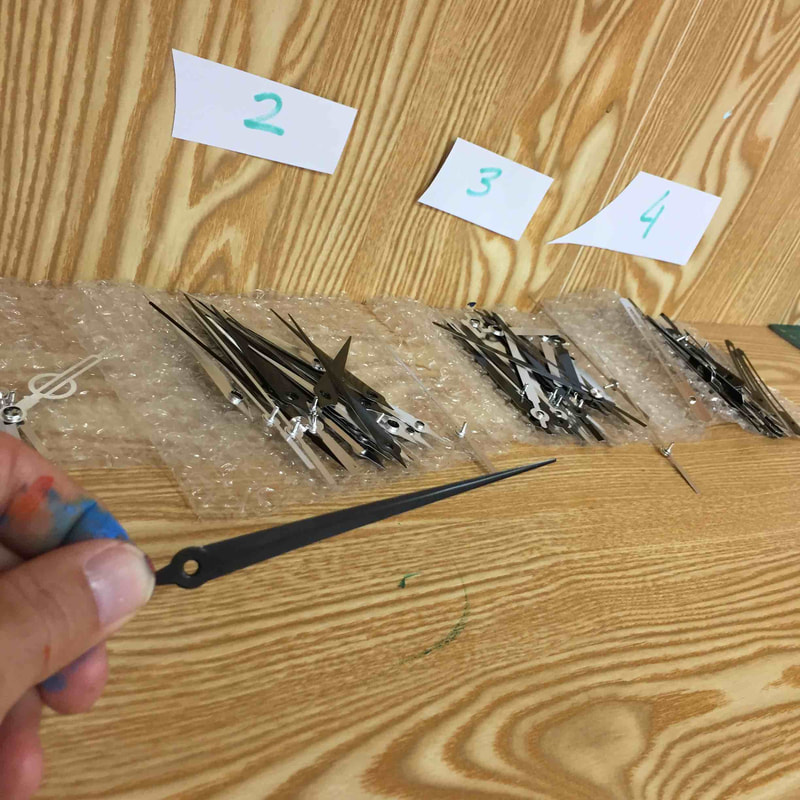
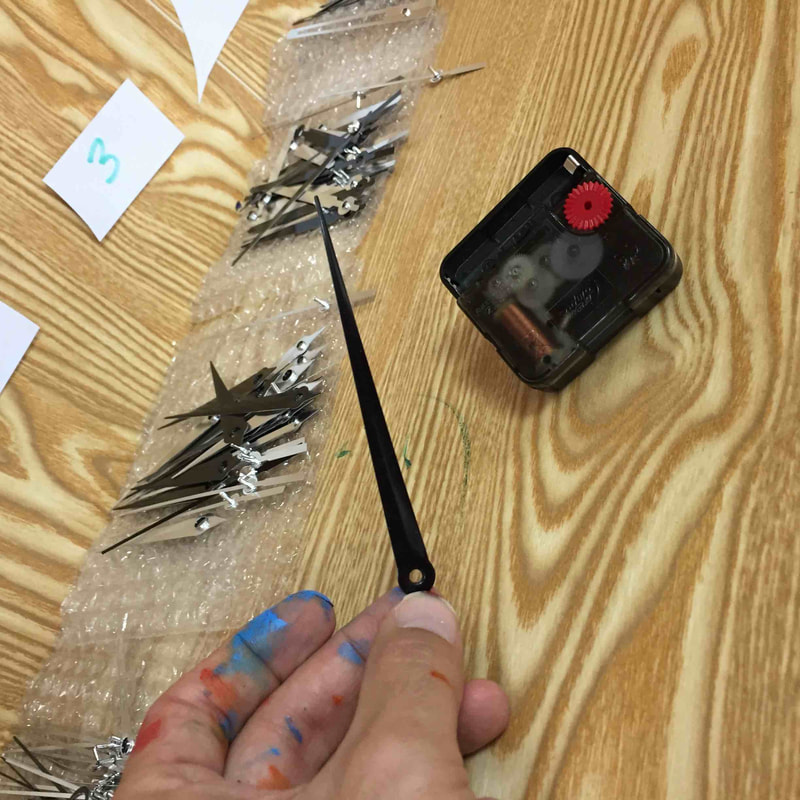
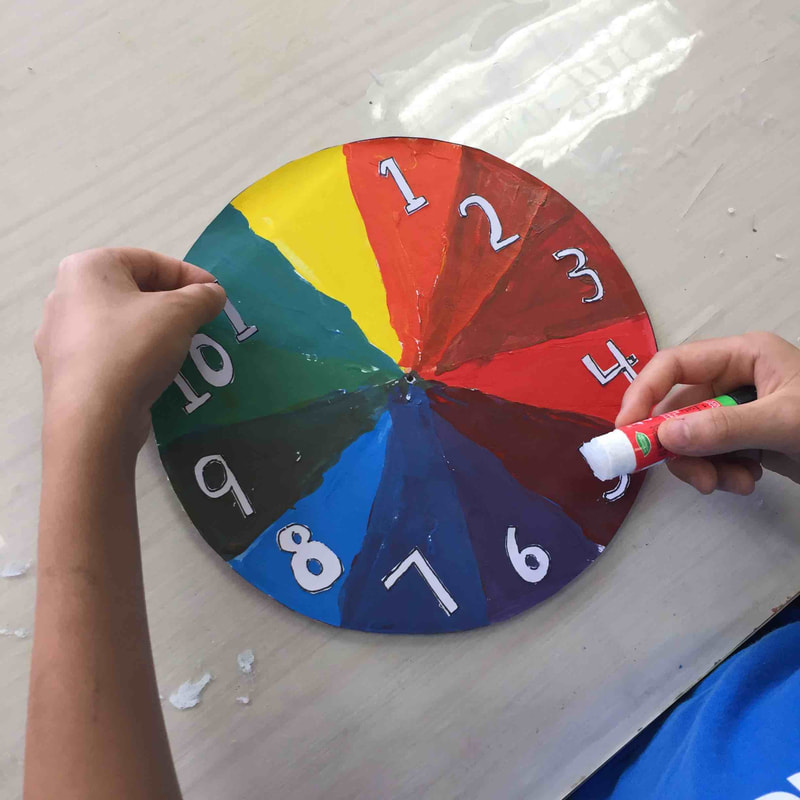
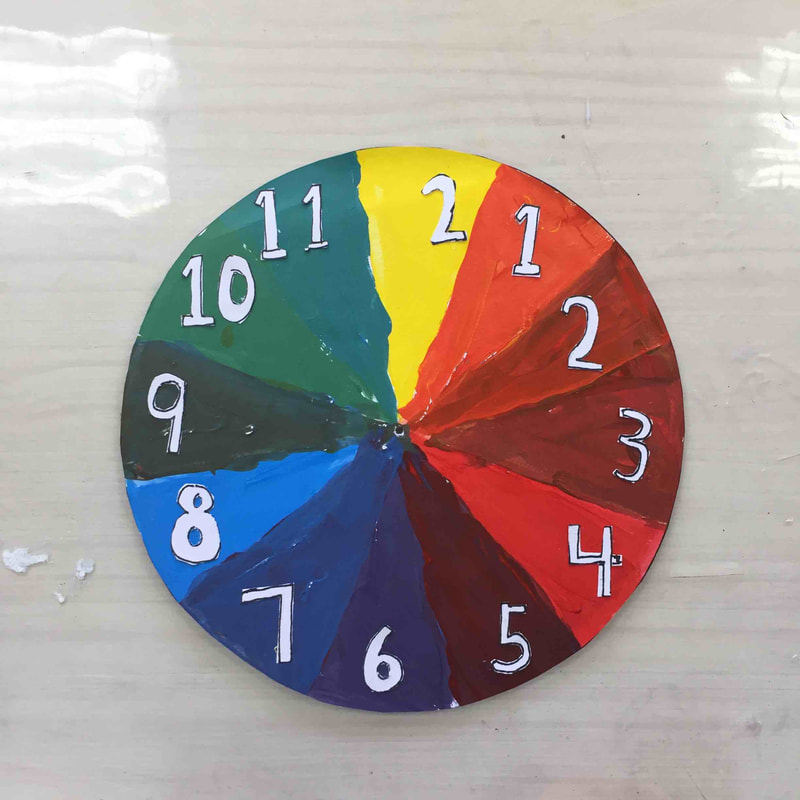
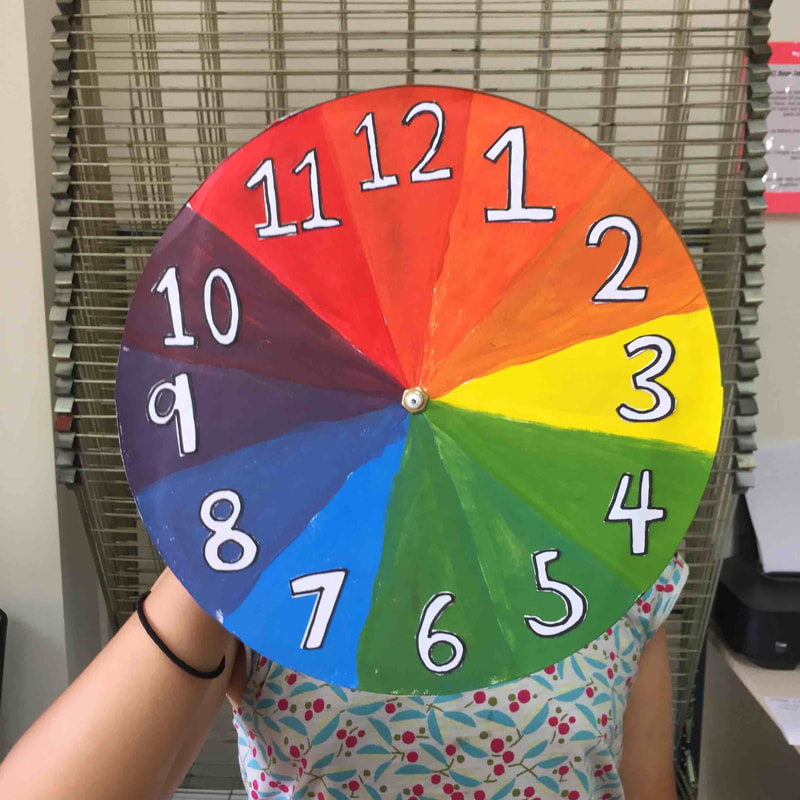
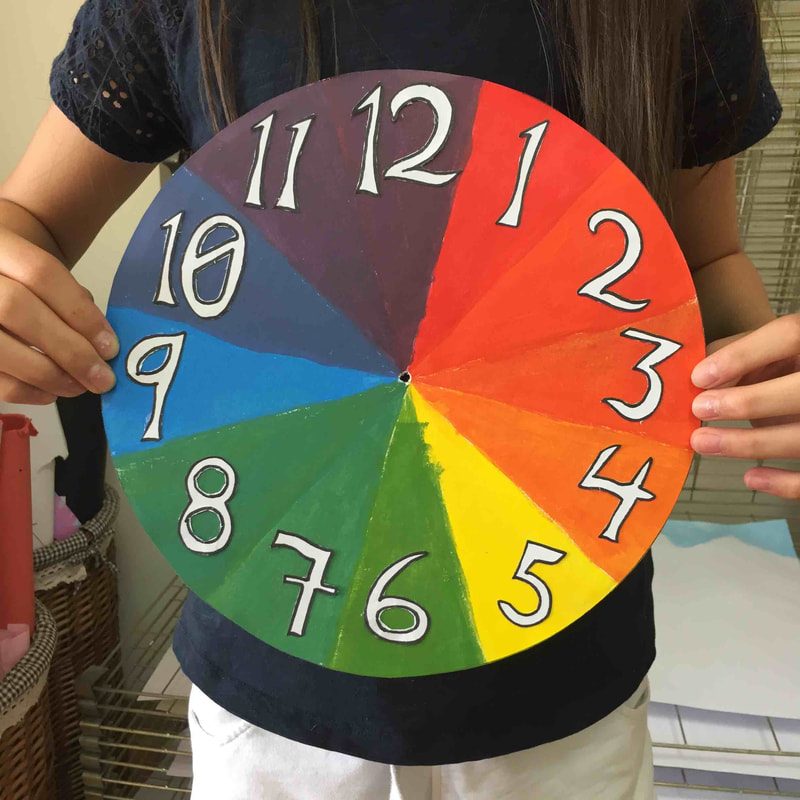
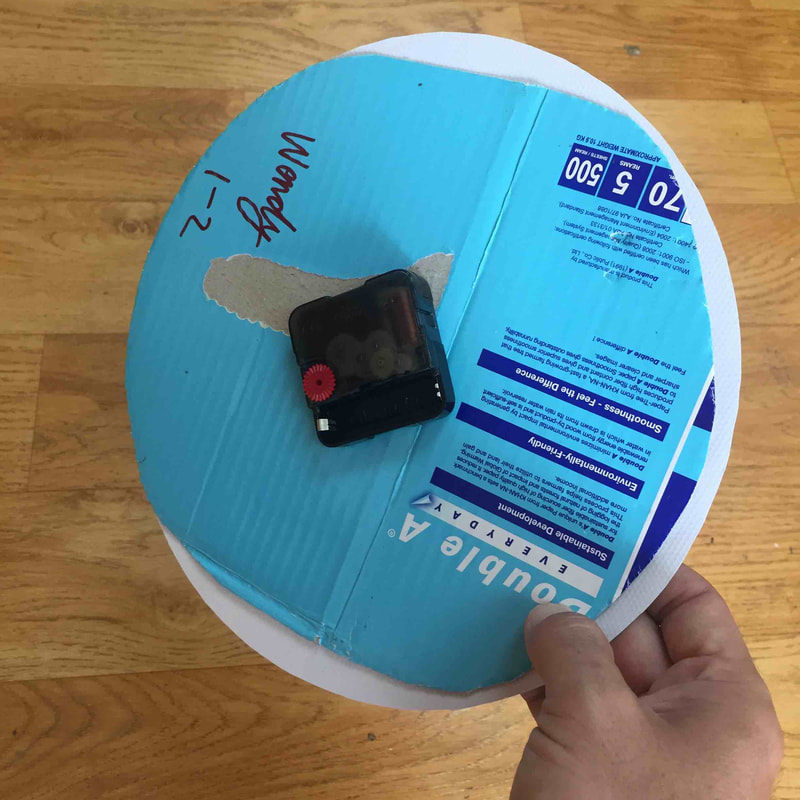
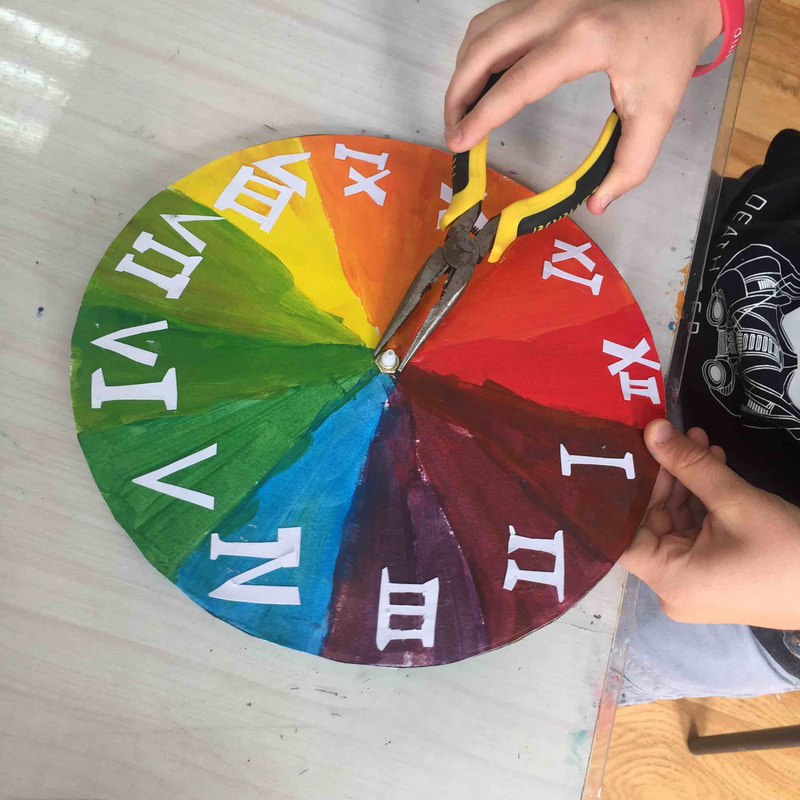
After deep discussion with our grade 5 and 6 about colours and its relation between themselves we decided to make this fantastic colour wheel clock. First thing we did was to work on a worksheet about vocabulary. We talked about what is a complementary colour, analogous colour, tints, shades, monochromatic, hues, values, etc... After playing with colours we started to work right away.
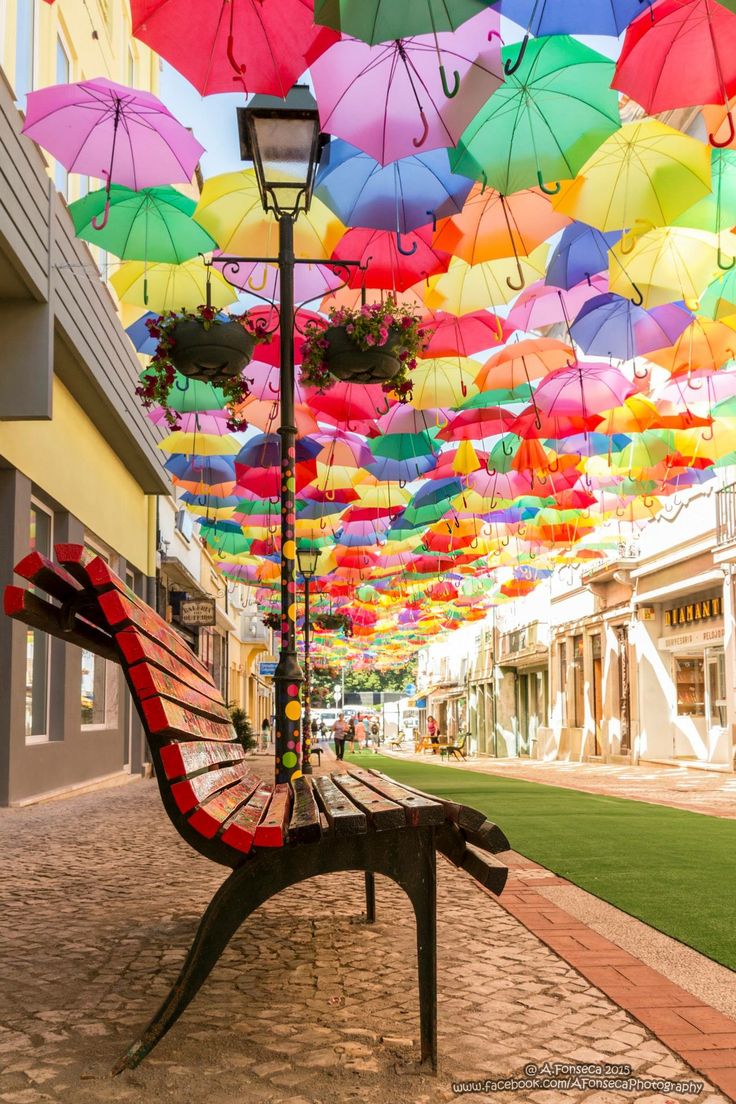
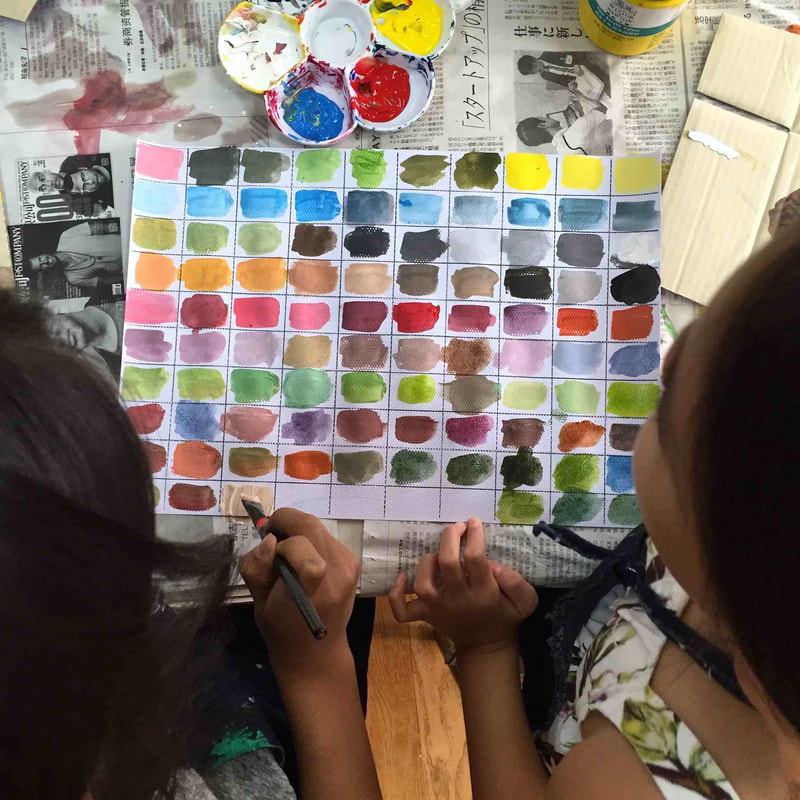
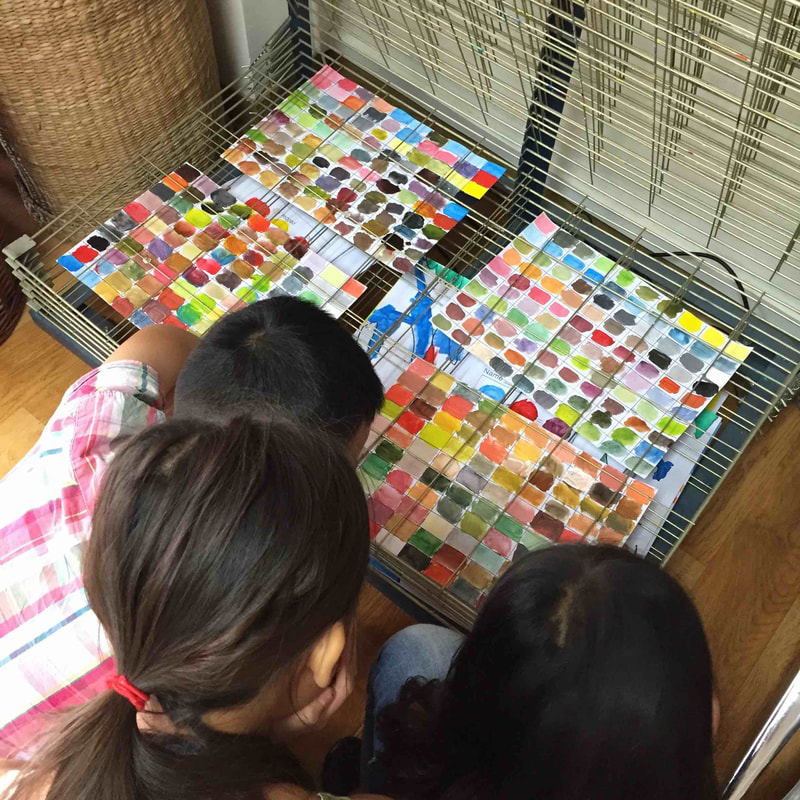
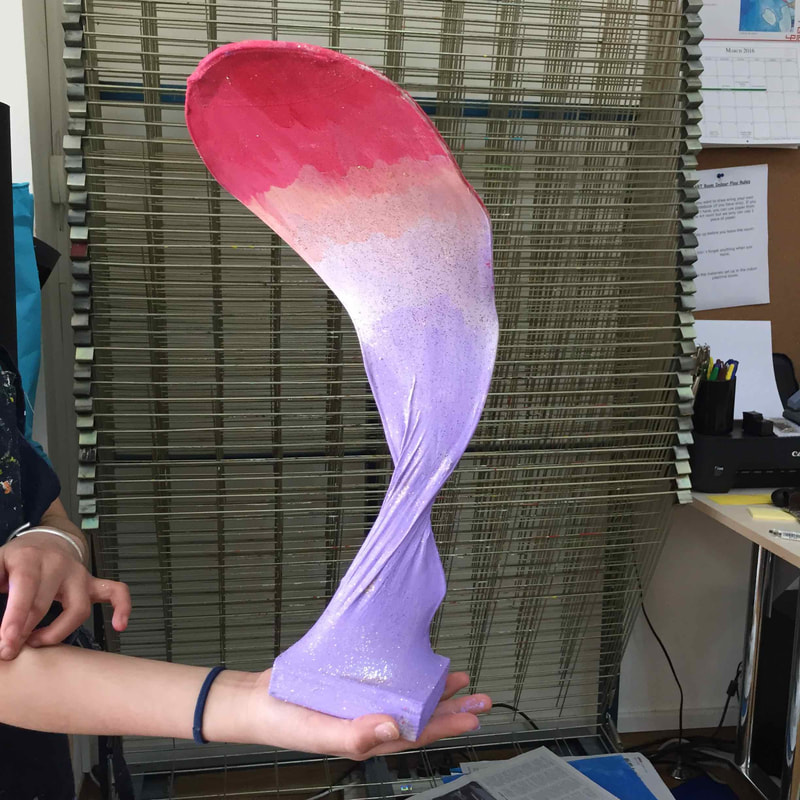
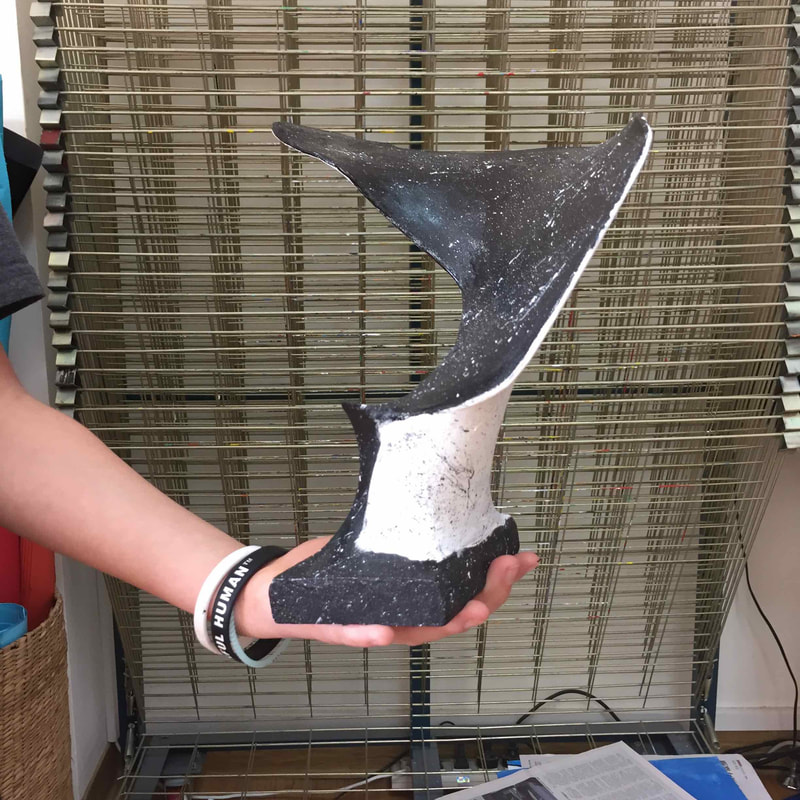
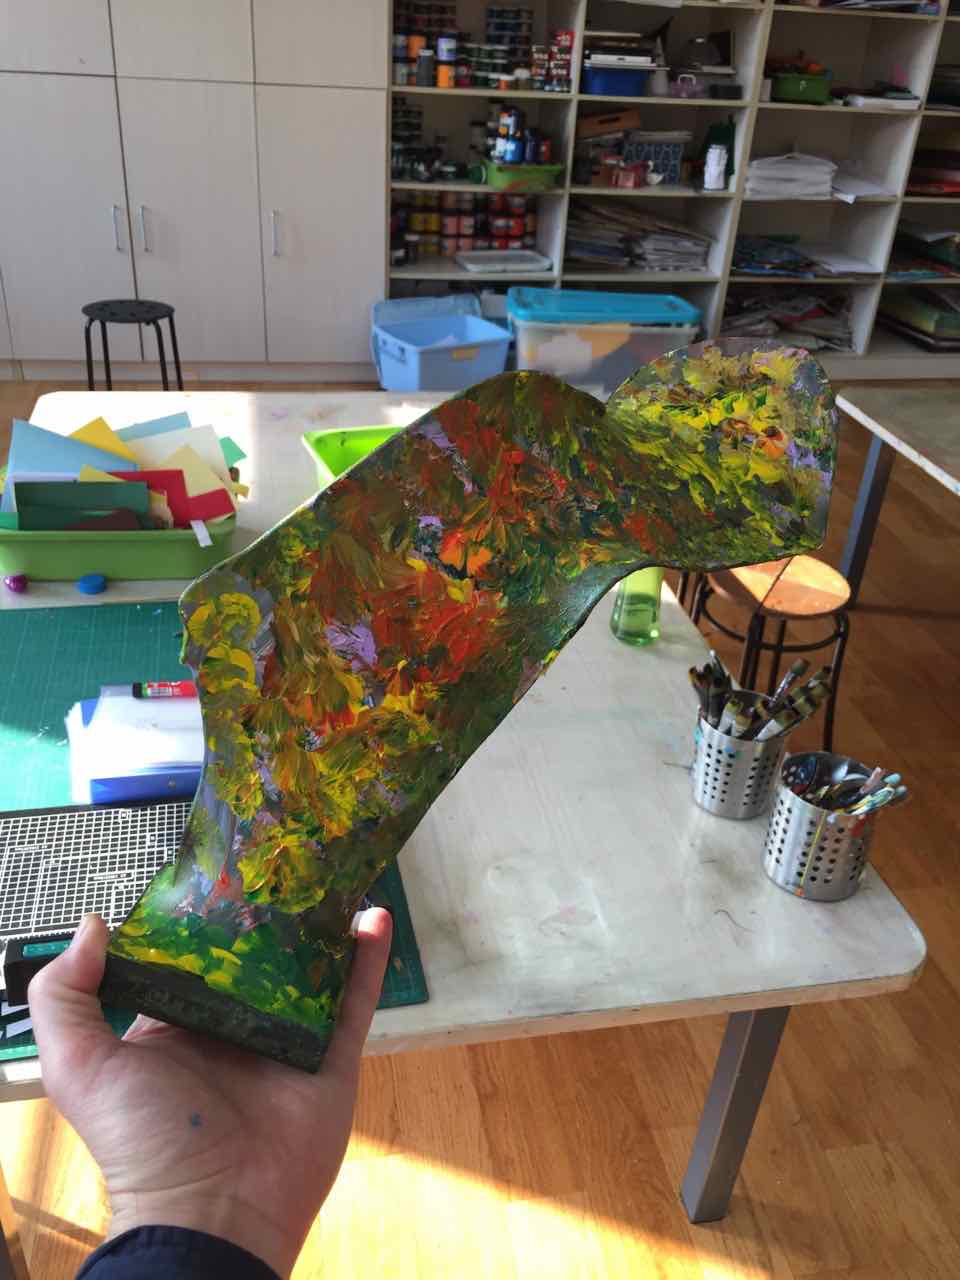
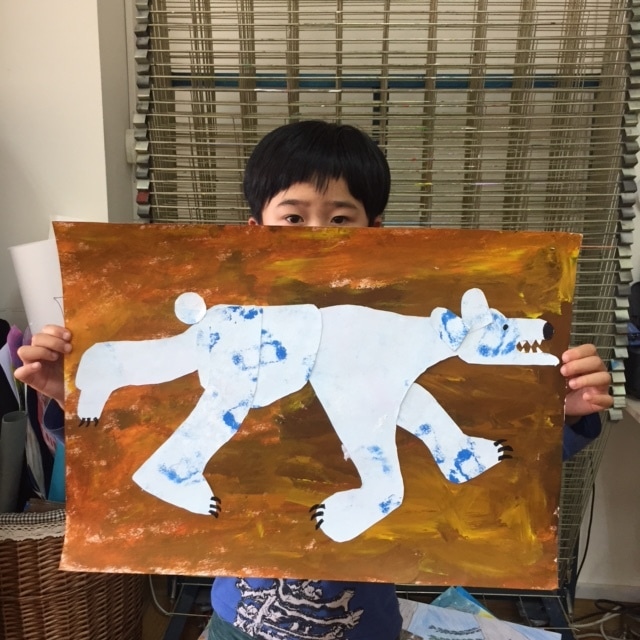
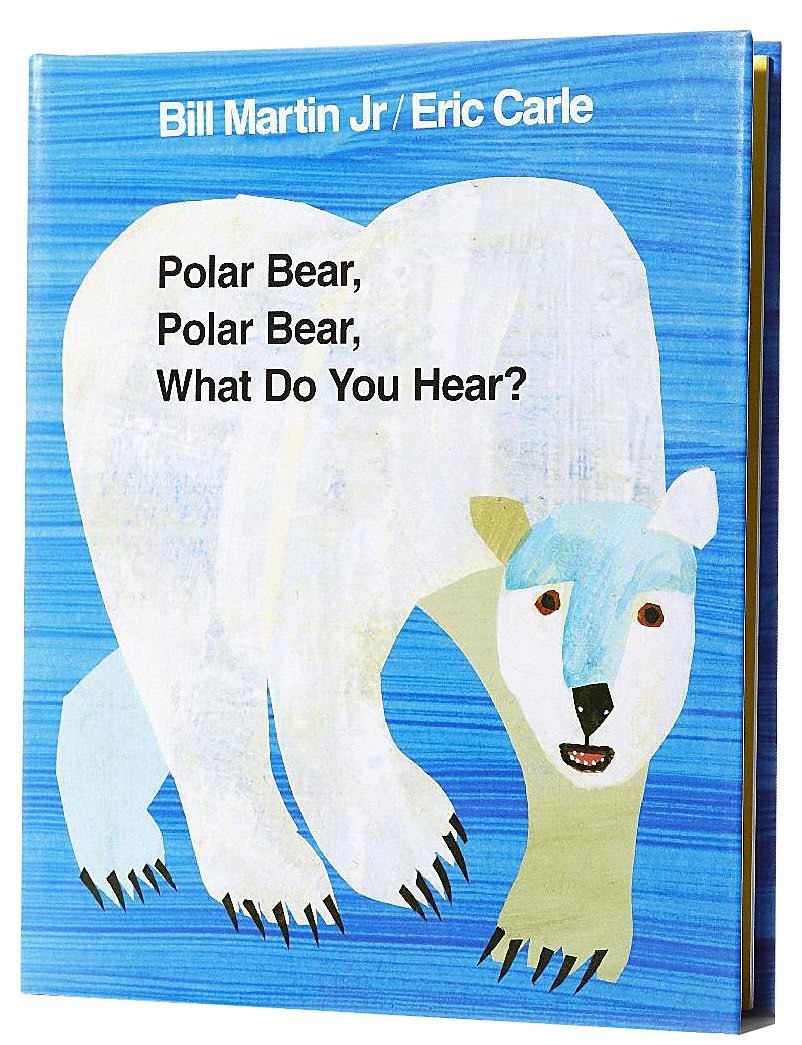
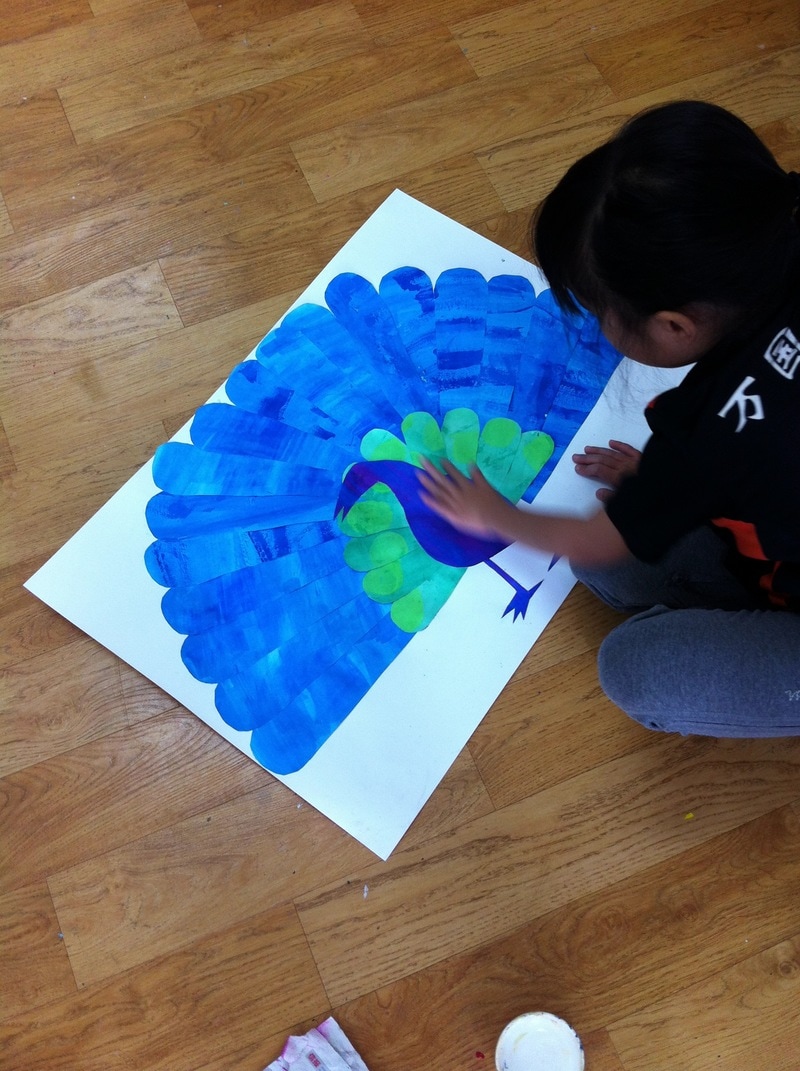
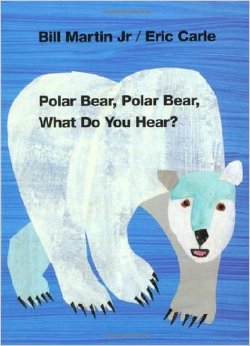
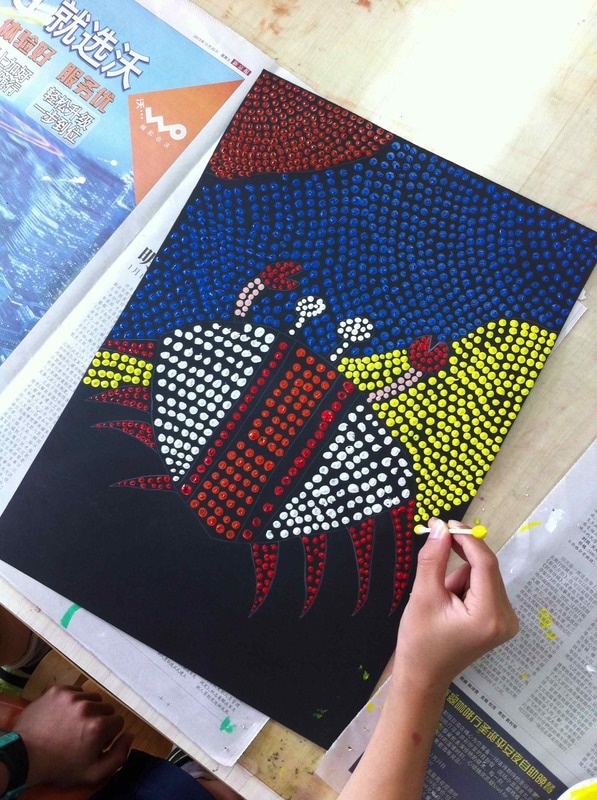
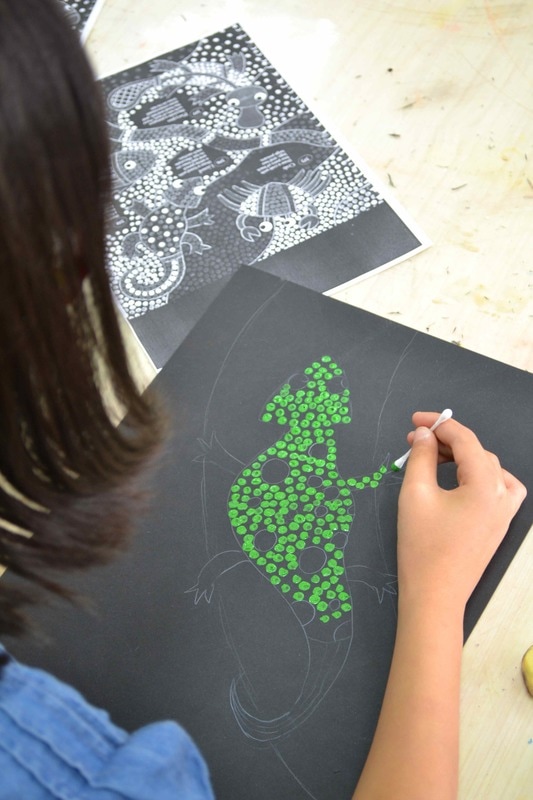
Our reception children have been experimenting with the primary and secondary colours and its relation between themselves. Different Portuguese cities like Coimbra, Águeda... inspired us to create these beautiful primary and secondary coloured umbrellas! When I found out about Kimmy Cantrell I thought we must do something in the art room. He usually works with clay but we did it using cardboard instead. His use of asymmetry fascinated the children. His work reminded to them to Picasso and African art, so we discussed quite a bit about his work/life. To be honest I was really impressed of how deep those grades 3 got into discussion. 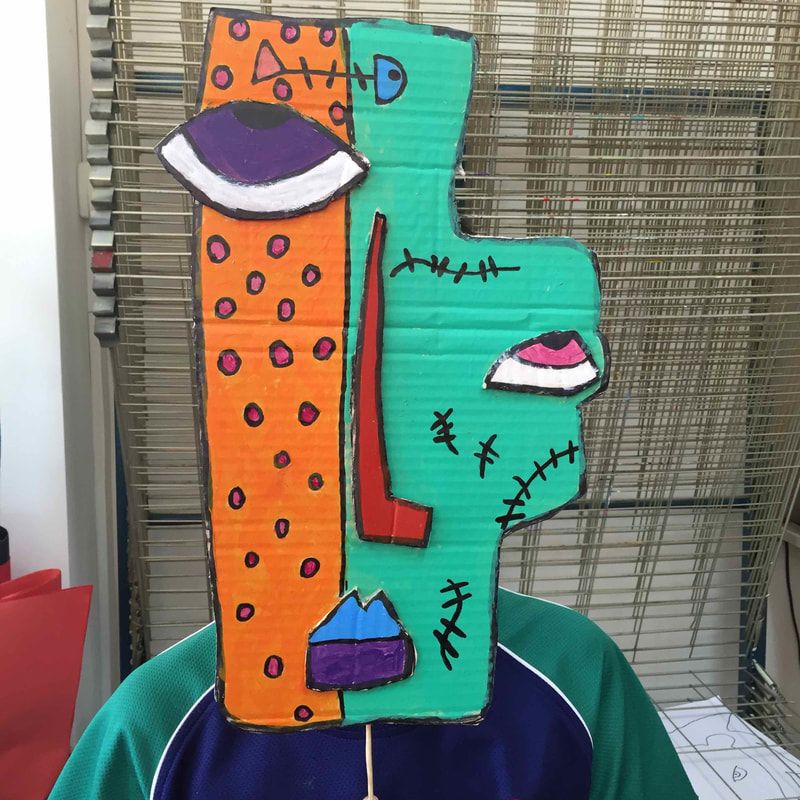 Grades 4 were challenge to make 100 colours using only the 3 primary colours, black and white. To make this sculpture we just need, one metal hanger, one pair (in this case just one leg of the pair) of tights, a small wood block for the base and acrylic paint. Final result is always really cool. Again the great Eric Carle. We made a painted paper lesson, it is such a fun technique, messy but fun. We first read the story, then we made the background paper and the polar bear paper. We used sponges, it is a very effective and fast technique and students love it so much. We limited the amount of colours to choose for the background to only 2. Second day we trace the parts of the polar bear (stencils previously made) on the back side of the white painted paper, cut them and glue them to the background. Picture Alex holding his master piece We found this superfun book (actually our fantastic librarian did) and we created this 2 lesson project. Day 1: We read the story, painted the background and the paper that we will use to make the rabbit. Next lesson children will retrace some stencils of the parts of the rabbit, cut them and assamble them all (check day 2) We all love Eric Carle and his wonderful world. This time was the turn of the book "Polar bear, polar bear, what do you hear?" It's such a fun book. We made few stencils so the students trace, cut and glu on previously painted papers. Here's Caroline in action! Fourth Graders were looking into Aboriginals in their classroom. So we took this oportunity to expand the lesson and create our very own Aboriginal art piece. We talked about what materials they used, techniques, etc... So they designed their artwork and ready to go! We used a black colour paper, so the acrylic stands out much more, and we chose an A4 size paper so the proccess won´t take too long. The results were stunning! |
Positive, Creative Space.
Archives
December 2023
|


 RSS Feed
