|
Our fifth and sixth graders learned in depth about the the great Salvador Dalí. We saw his artwork, read about him, watch some videos of himself at work, interviews, etc... They absolutely loved him. It is great to somehow see the artist in action, to give him a face and especially Dalí...
0 Comments
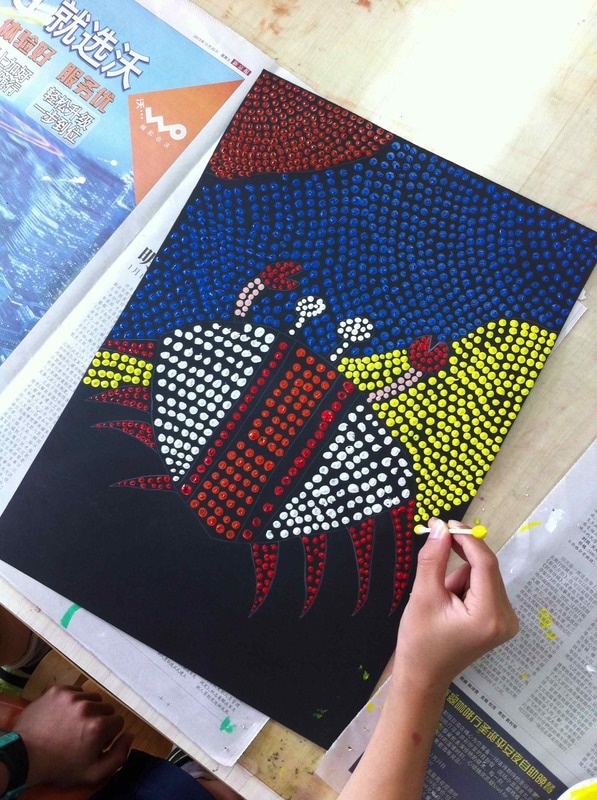
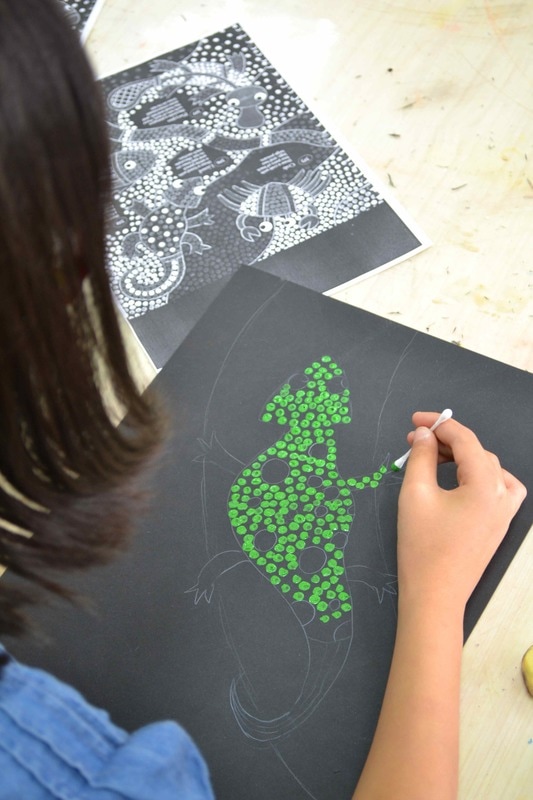
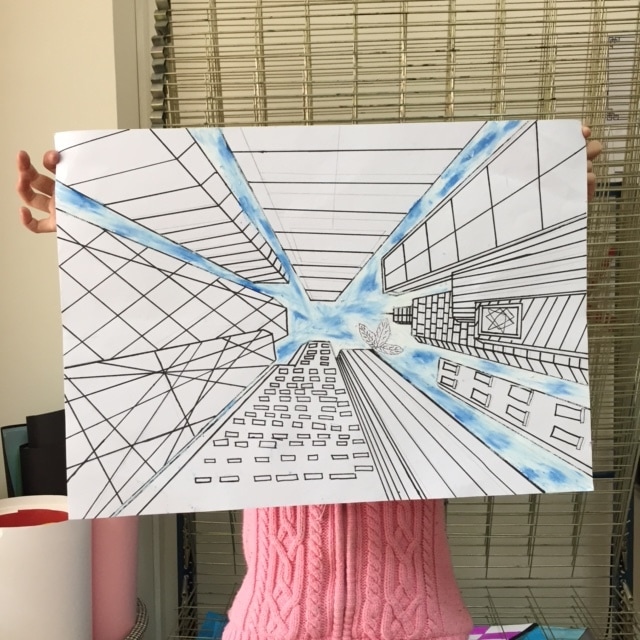
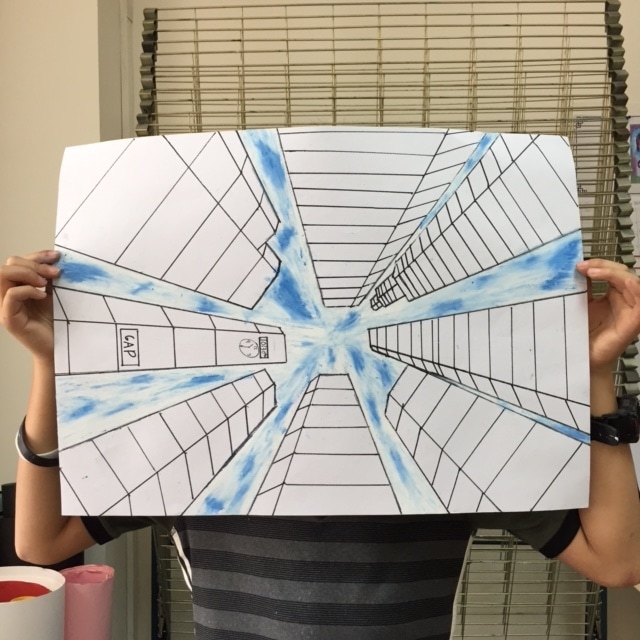
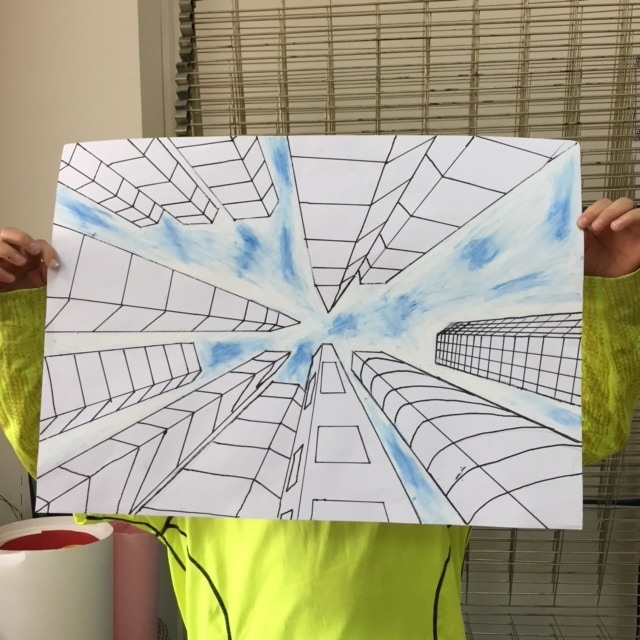
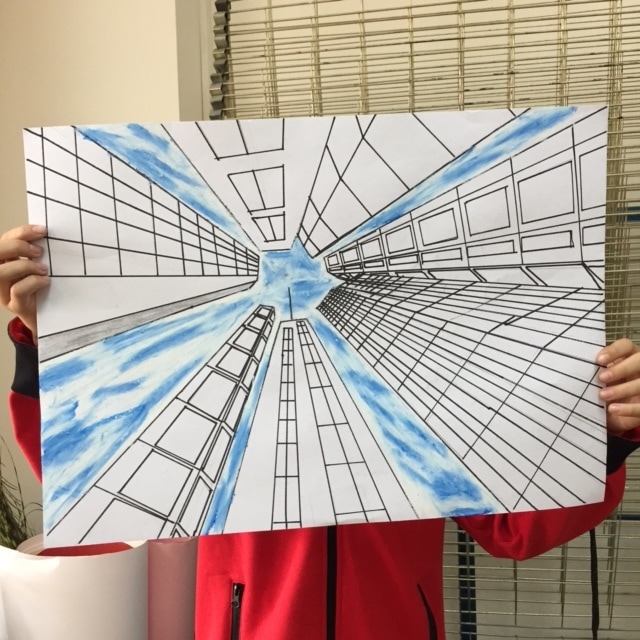
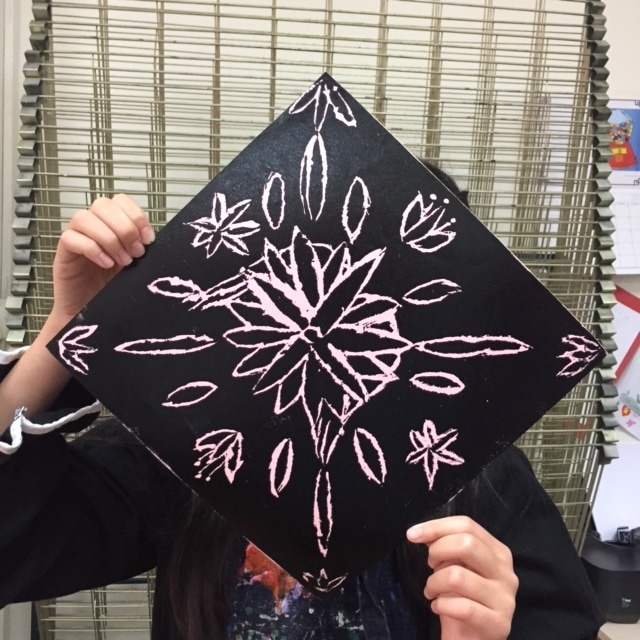
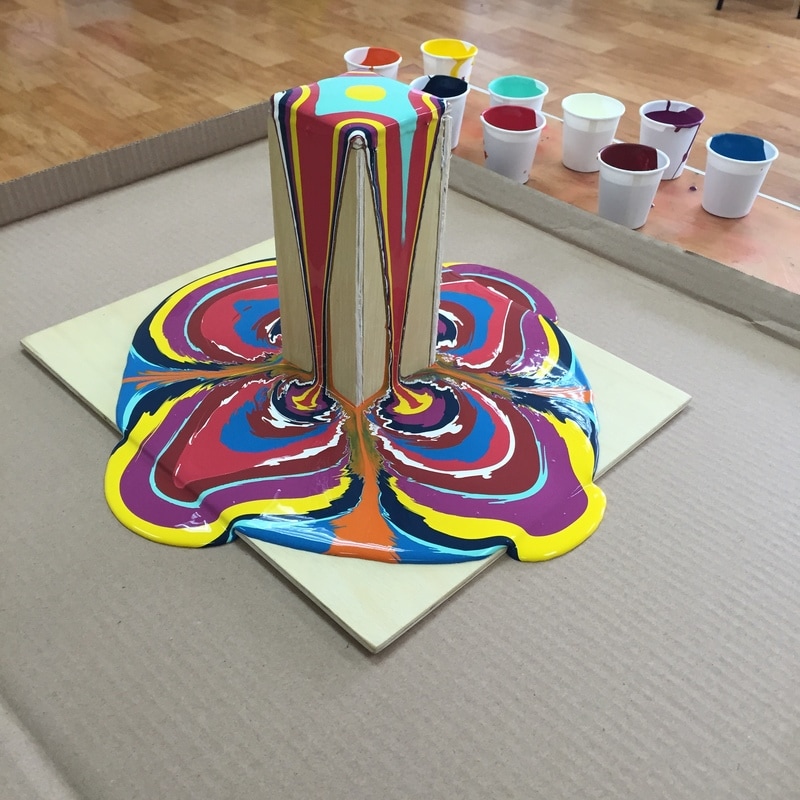
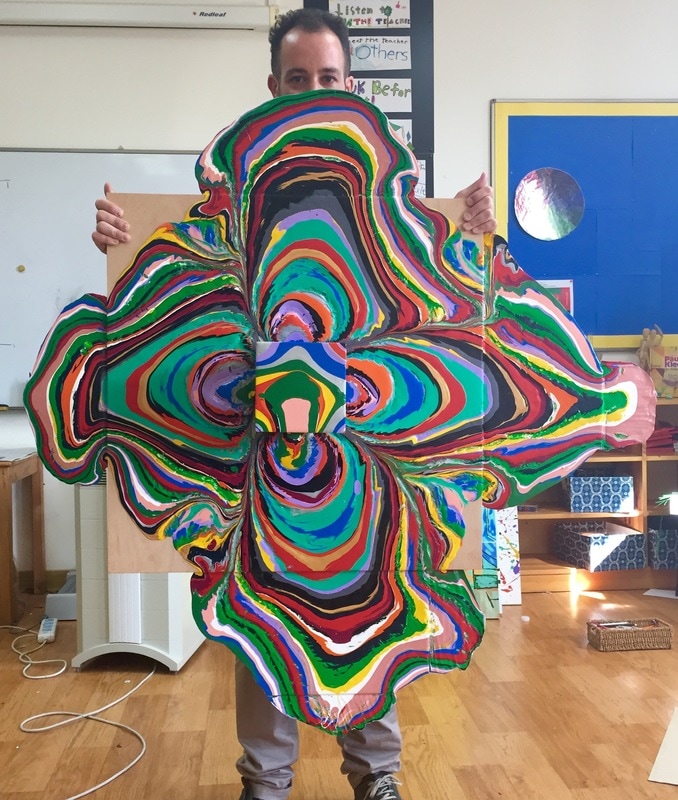
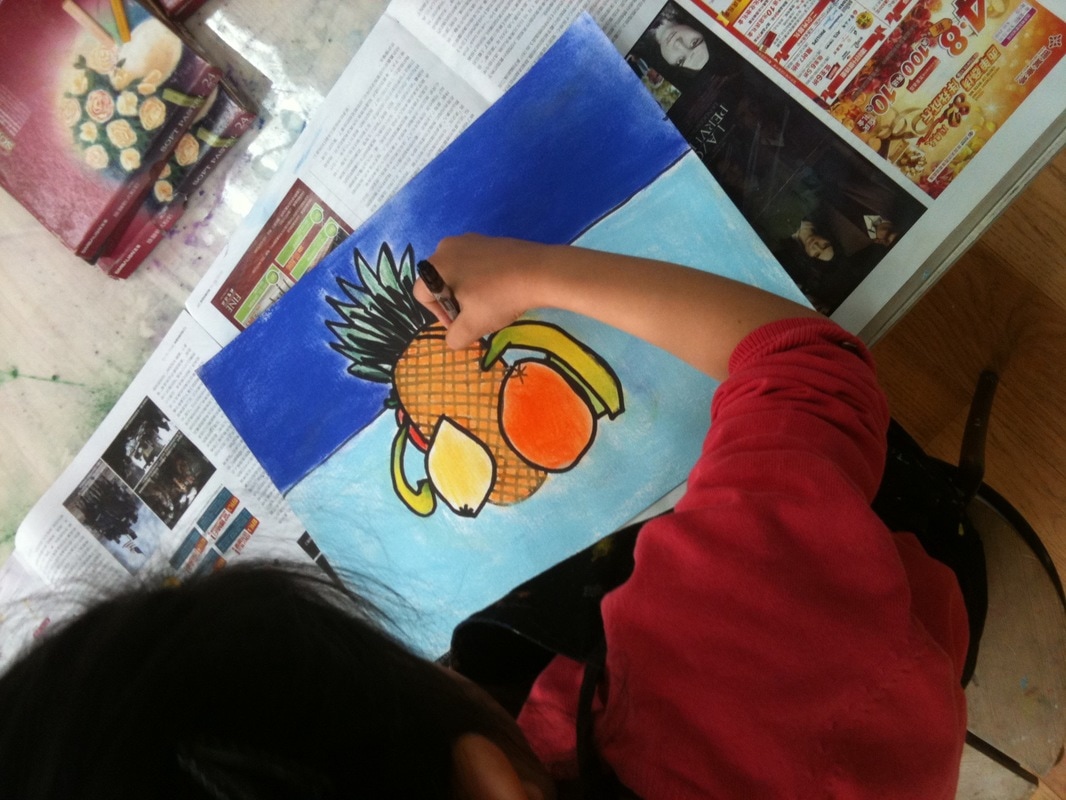
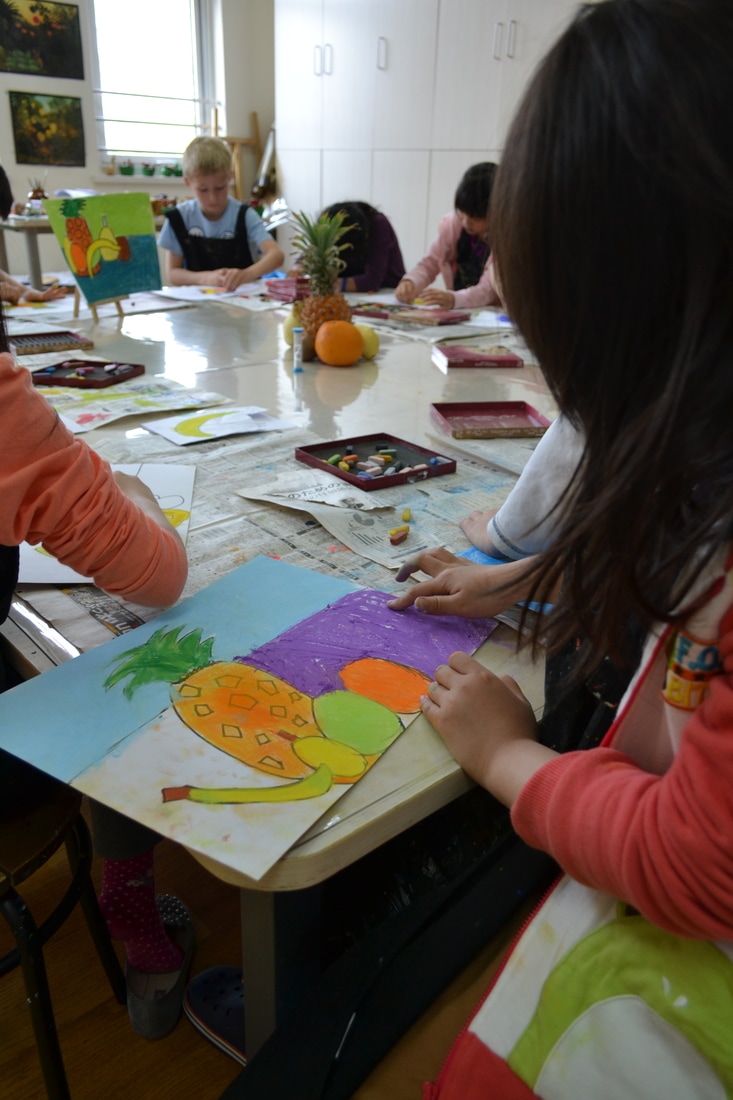
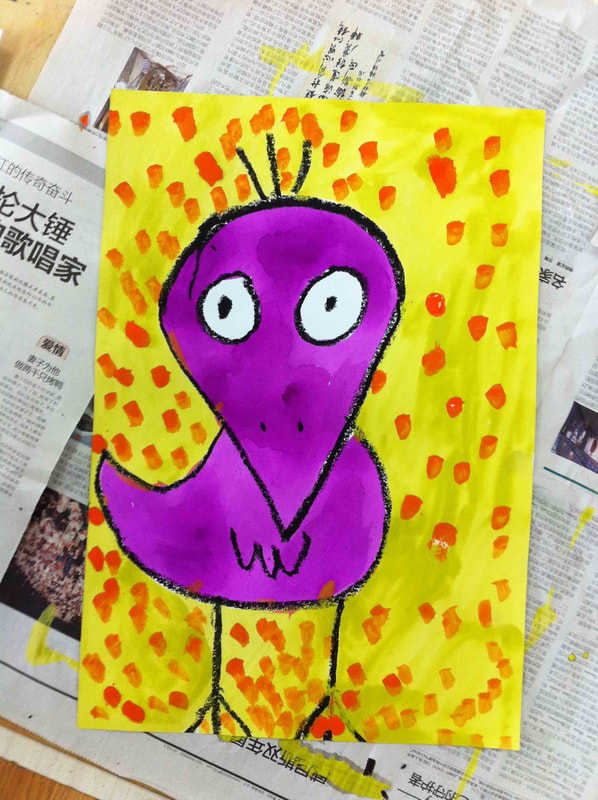
Fourth Graders were looking into Aboriginals in their classroom. So we took this oportunity to expand the lesson and create our very own Aboriginal art piece. We talked about what materials they used, techniques, etc... So they designed their artwork and ready to go! We used a black colour paper, so the acrylic stands out much more, and we chose an A4 size paper so the proccess won´t take too long. The results were stunning! Our Upper Elementary children made this beautiful mural with artists El Tono. The process was very intricate, and allowed the children to work together as a team to create this striking piece of art. To start us off, Tono held a presentation in which they explained his amazing art work and the methods they used. The children were given the opportunity here to ask questions, and discuss this unique form of modern art in a group setting. It was wonderful to hear them express their insights! After a lively discussion amongst peers, they were ready rolled up their sleeves and get to work! First, a grid was drawn on the wall with wipe-away chalk. The horizontal lines were then marked with numbers, and the horizontal lines were marked with letters. Next, four jars were displayed, containing cards marked with letters, numbers, direction-indicating arrows, and colours. Each child was instructed to take one card from each jar. The drawn number and a letter gave us a coordinate; a starting point for their line. The direction card indicated what direction their line would go into from that point onwards, and the colour card indicated the colour of their line. Discovering each distinctive combination was a thrilling experience for the children. With their formula in hand, the children were able to make their personal contribution to this work of art. They used masking tape to ensure their lines were clean and straight. After they filled in their section, the children ripped the lines of masking tape off one by one. This proved to be the most enjoyable part of the activity. Seeing their individual work become a part of a greater image was exhilarating! This structured and calculated method provided the children with an endless number of random lines, created a stunning and exceptional image, full of coincidental collisions. Here we have displayed a soft copy of the broken-down data that forms each individual line, can you find yours? Check Tono´s website, there you will find all his artwork, they are really interesting! https://www.eltono.com/es/ 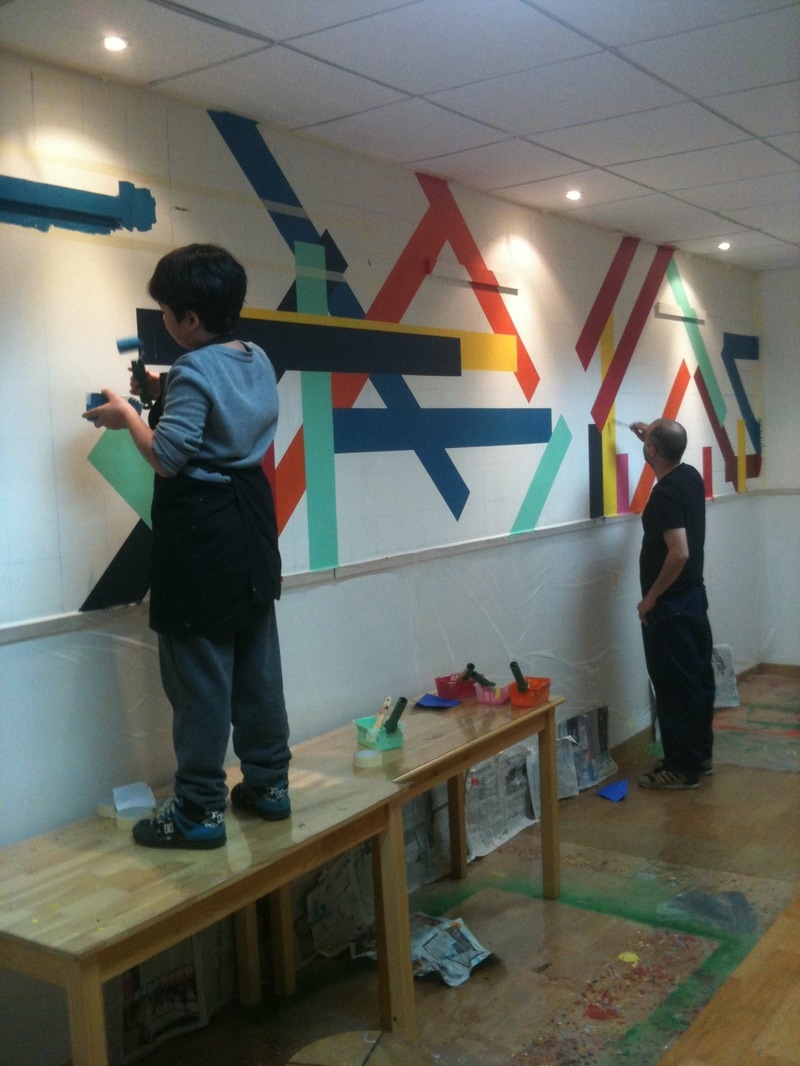 Grades 5 and 6 saw the different perspectives that you can use when you draw. We used this one point perspective to create the illusion of looking up at the buildings. Sky was done with blue and white oil crayons. Fourth graders learned about rotational simmetry. They made their own designed, so once it was done we passed to the action. A full table with ink and rolls was waiting for them. Each student made 4 printings. Intense lesson but great reward at the end. Holton Rower inspired us to make this fantastic group project. At the end of every year we host a great annual Art Show. We make one group project with every grade. Grade 4 got the chance to get to know Holton's artwork and create this wonderful piece. We have been discussing with our first graders about what is Still Life. After lively discussion, a fruit set up was displayed. We put two big tables together and I set up a beautiful, fresh and yummy bunch of fruits in the middle. The whole classroom is around the tables which gives to each student a different view. This time we used soft pastels.
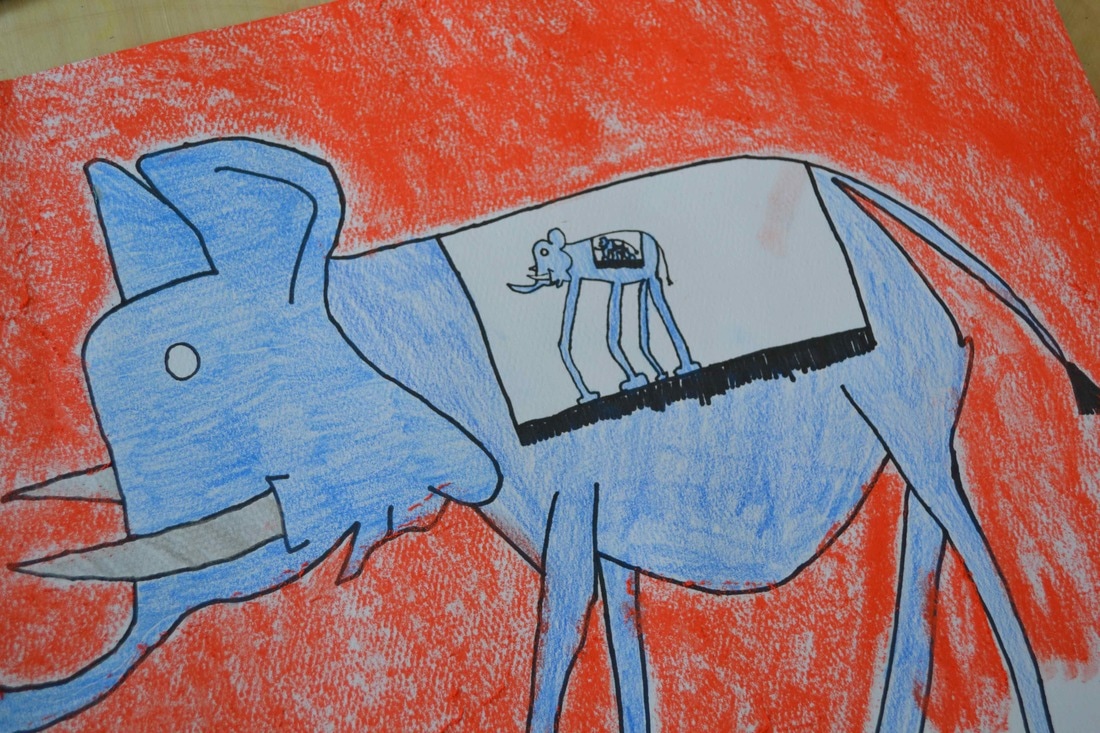
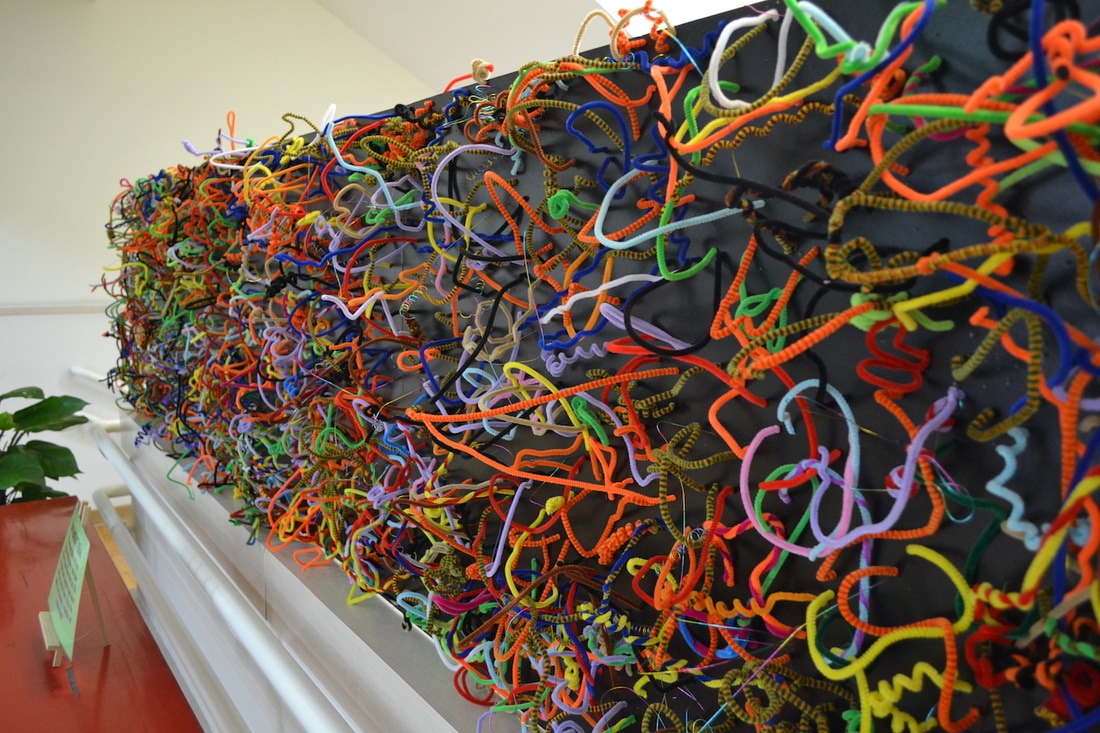
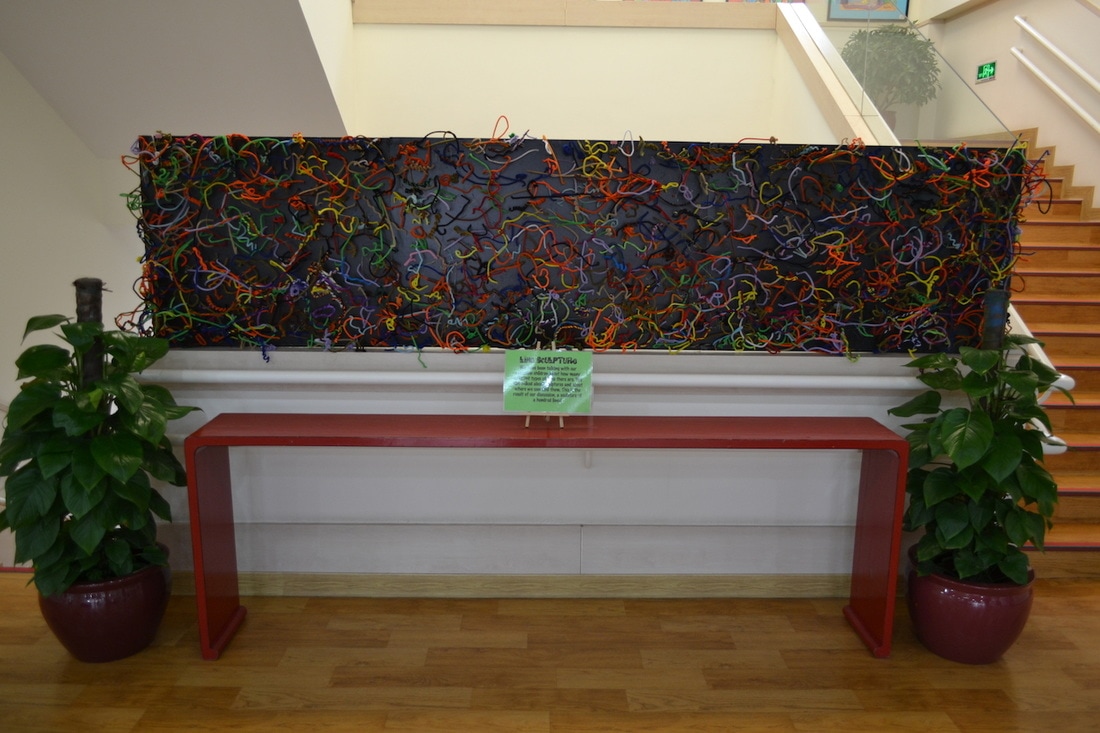
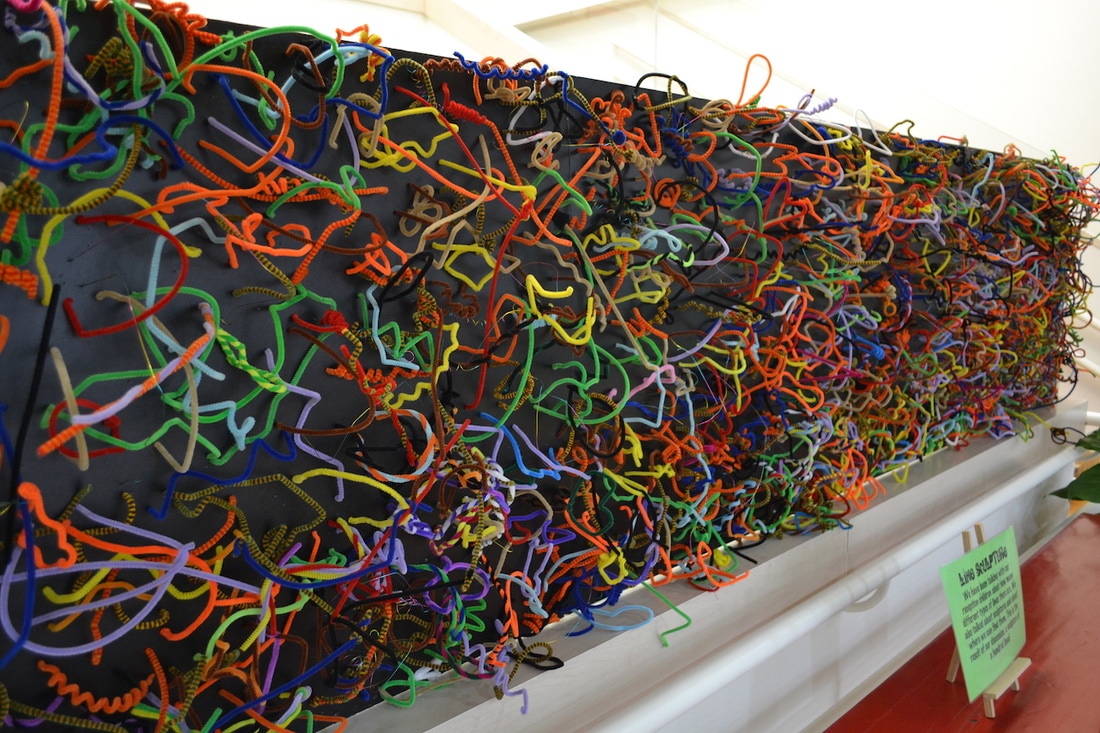
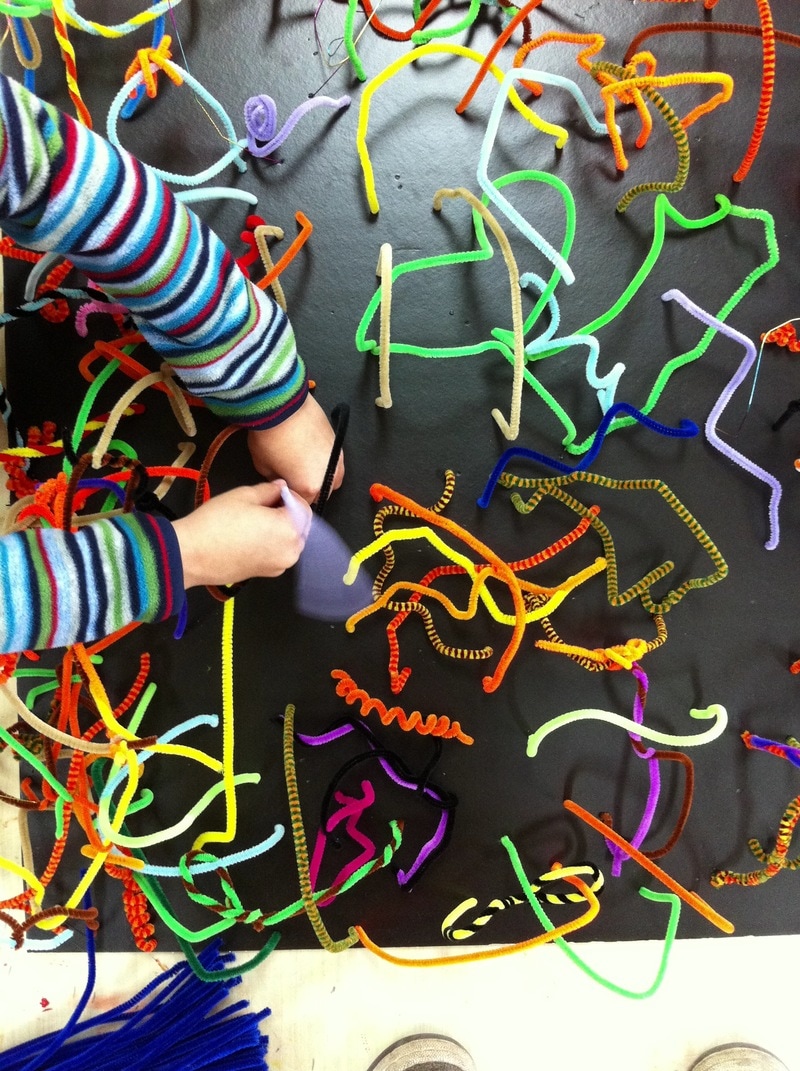
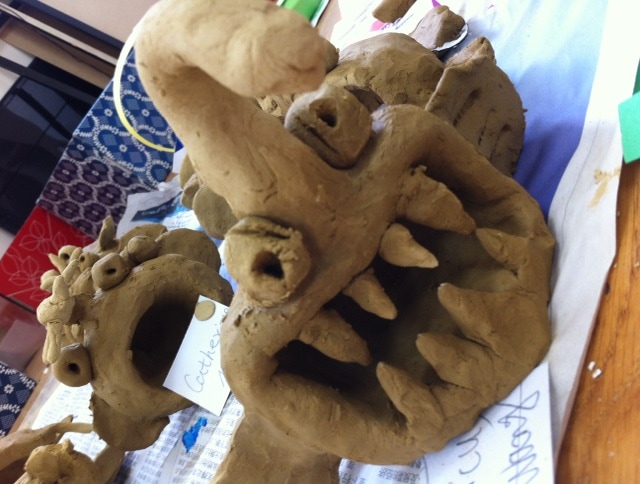
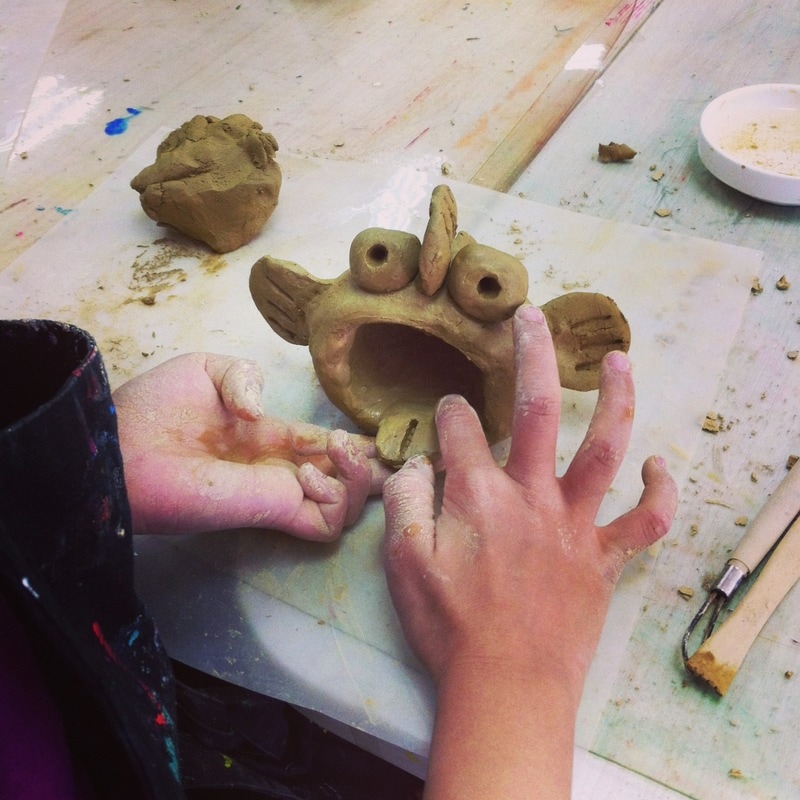
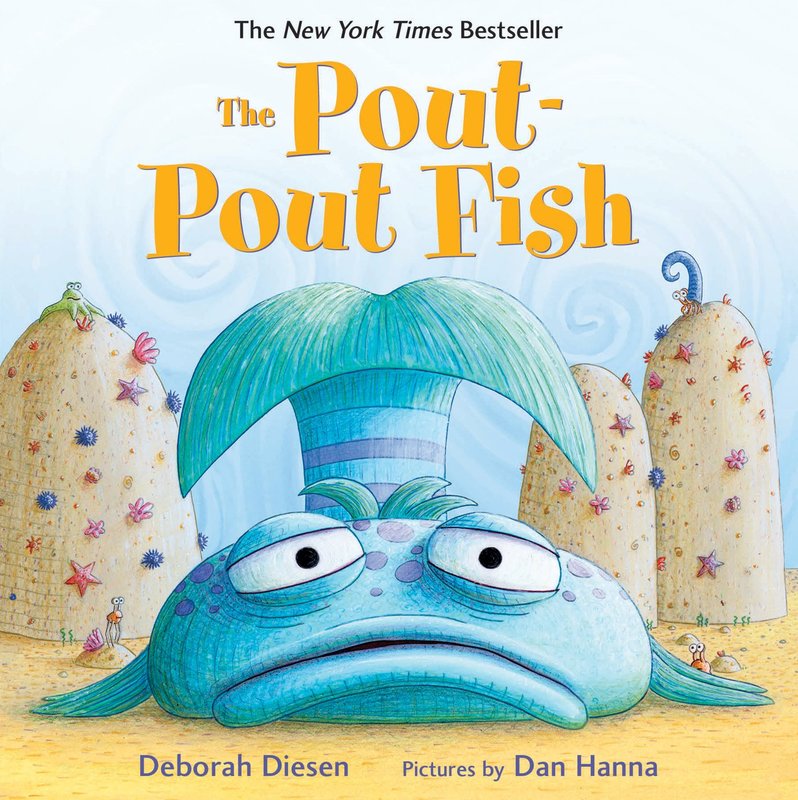
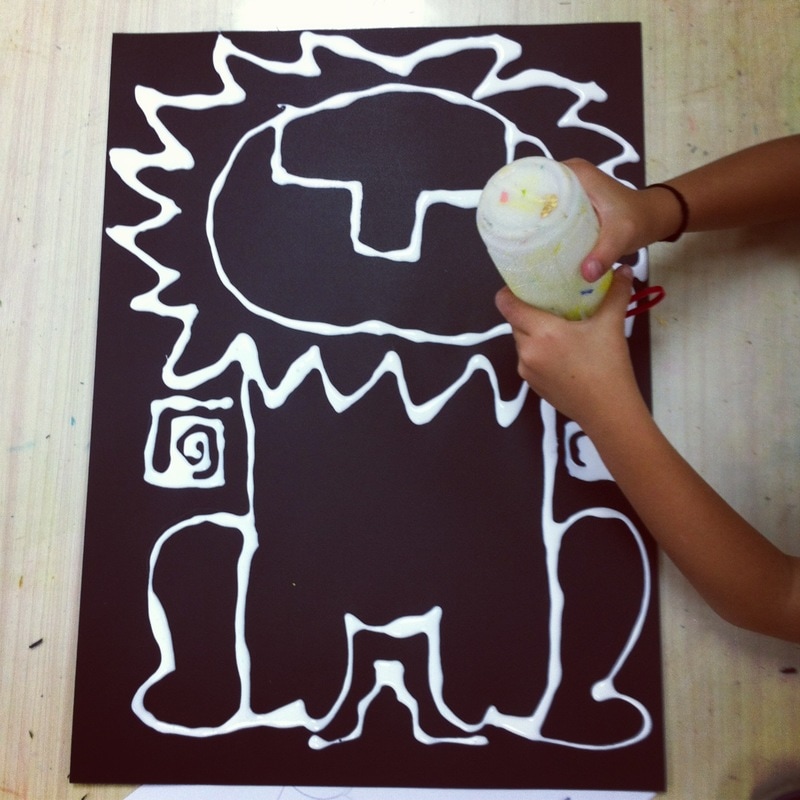
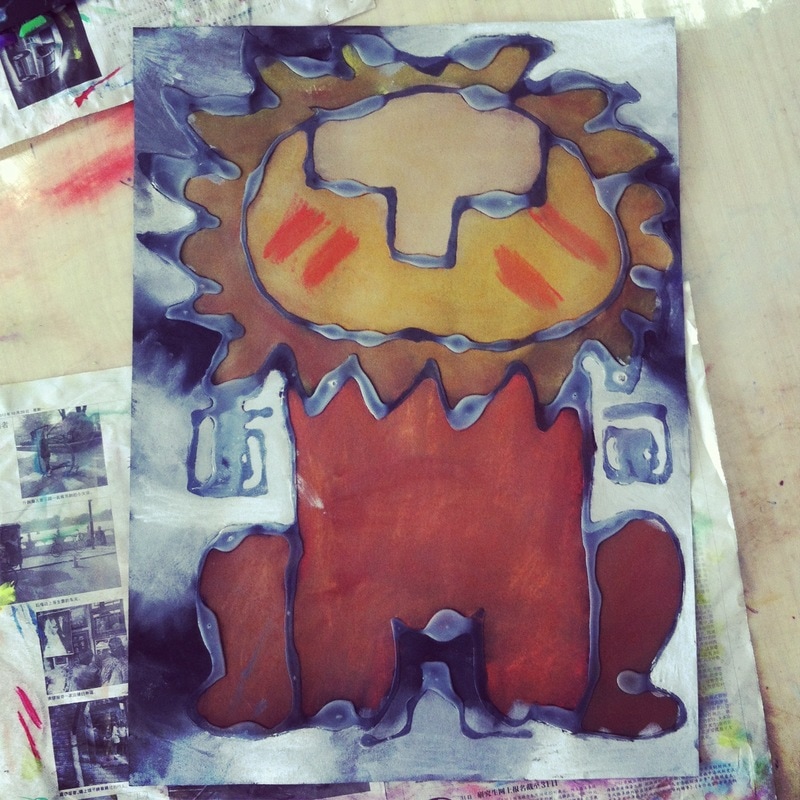
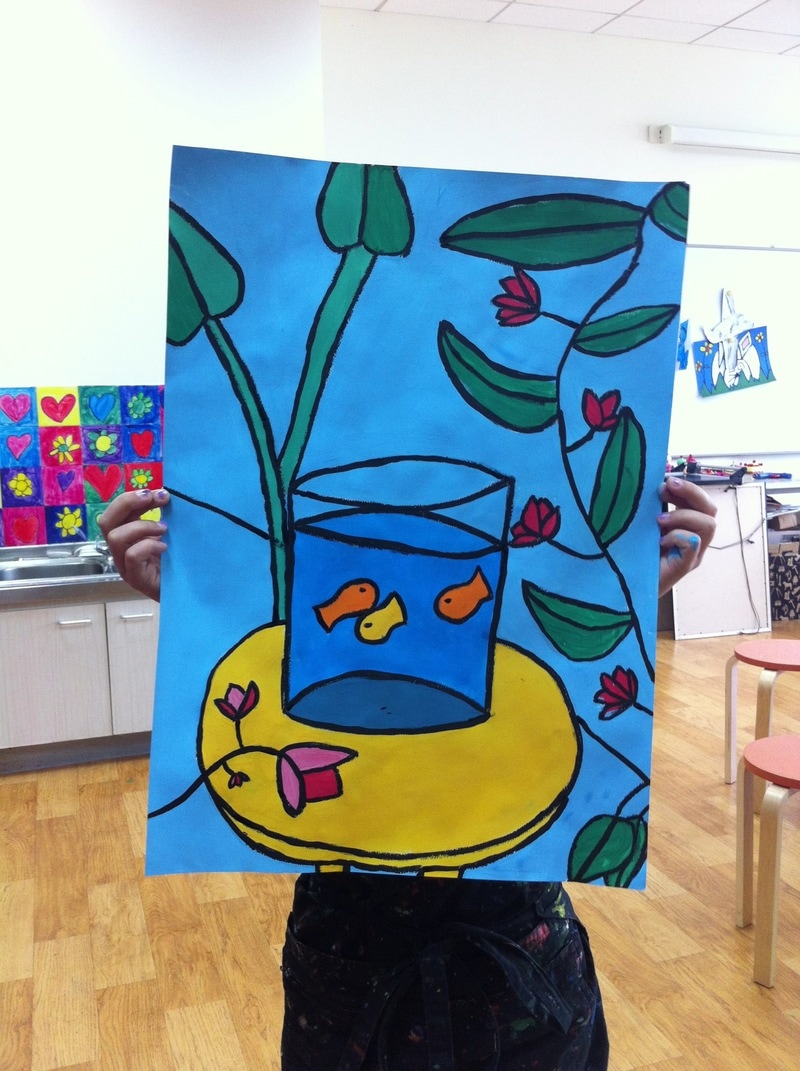
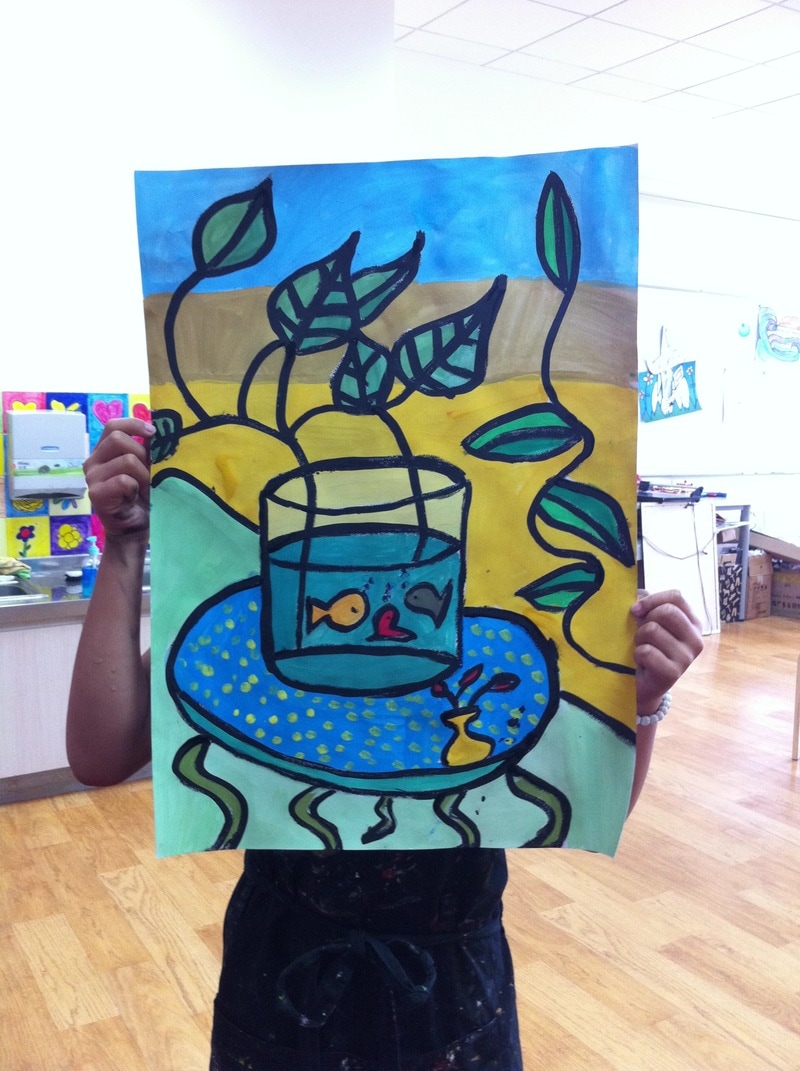
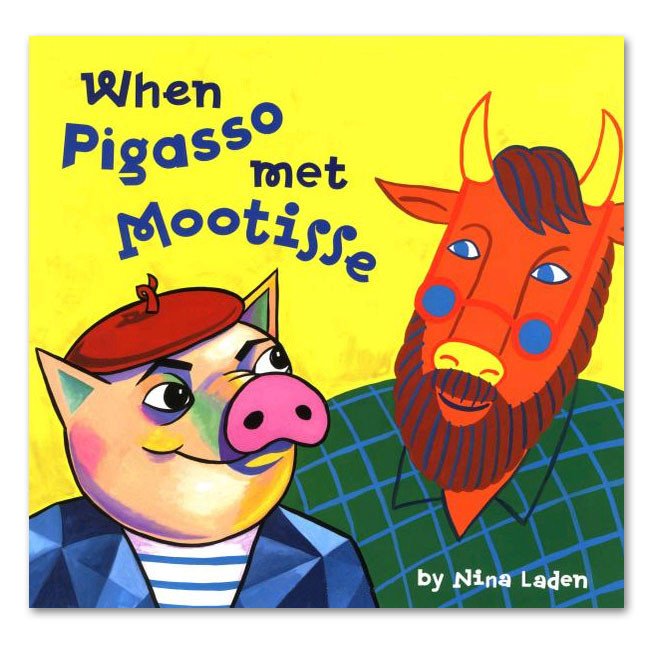
After lively discussion with our smallest about what symmetry is, discussing about it, playing/making different activities etc… We made this project. I previously fold the piece of paper in exactly two parts so they will draw only in one half of the paper, they will draw a half butterfly with black oil crayon. When it´s done, we will fold the paper again and press everywhere. We make sure that the half butterfly pass to the other half of the paper with the pressure we are making on the paper, or at least enough for us to be able to see it. Then we retrace and we should get a “perfect” simmetric buterfly. When all the outline is done, we will use watercolour to paint our butterfly. The oil crayon will resist the waterolour, so the watercolour should not pass the black lines. 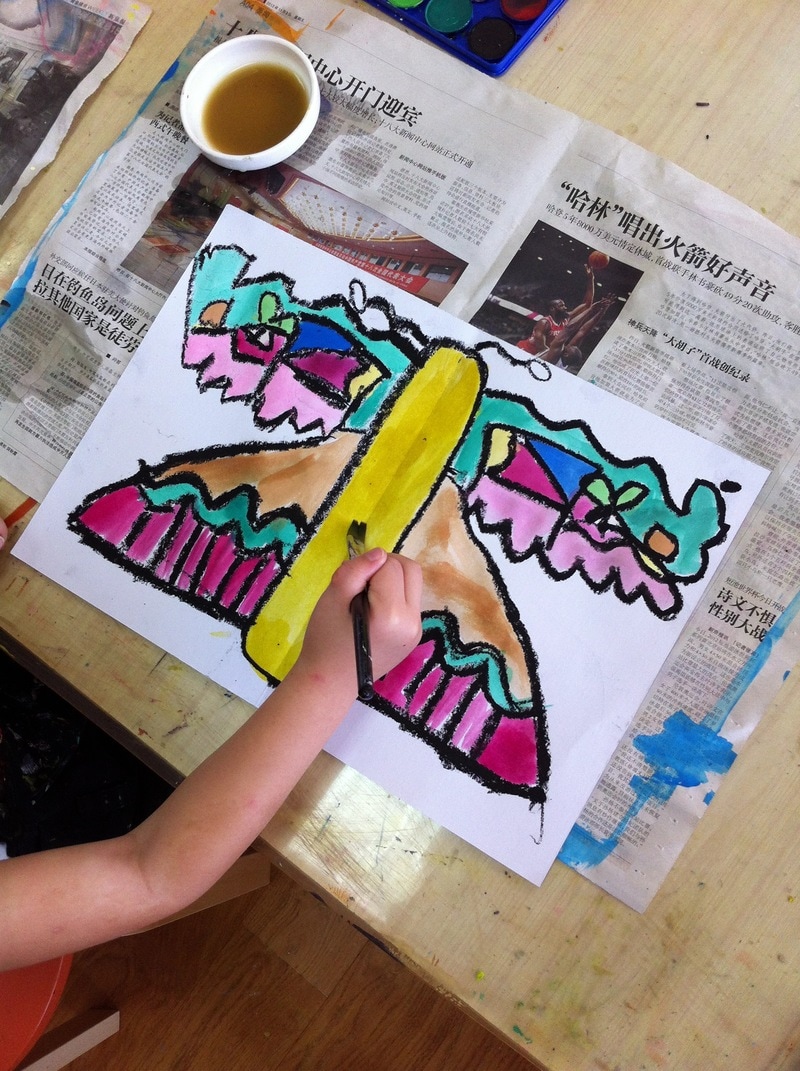 We have been talking with our reception children about how many different types of lines there are. We also talked about sculptures and about where we can find them. This is the result of our discussion, a sculpture of a hundred lines! We used basically two things. KD board (I am a big fan of KD board, it is the most useful thing in this world!) and Pipe cleaners. The more colourful the better. One of the million things that I love of my job is that I got to discover and to know a lot of new artists, new art techniques, new people... James Rizzi is one of them and I absolutely love his work. His colours, lines and drawing makes him perfect for an art project. Beside Rizzi we also talked about the watercolour resistance to oil pastel. Lesson inspired by deepspacesparkle. Clay time! We found the fantastic book the Pout-Pout Fish. We used 3 lessons, including one to introduce the clay. It is such an exciting fun time for them. Everybody loves clay. We usually have 2-3 clay lessons / year. One of them is one the most expected weeks of the year, the pottery wheel week! Second graders are talking in their classroom about Africa and its life. We came up with this project, using glue for drawing and soft pastel for colouring. Someone really special gave me this book a couple of years ago, “When Pigasso met Mootise” by Nina Laden. It is such a fun story and the perfect way to introduce Picasso and Matisse. We focused on Matisse this time. We talked about the artist and his life, we saw and discussed some of his artwork and we ended up making our very own Matisse. Project inspired by the great Eric Carle. Duration: 2 lessons 1 hour each We found the book “The artist who painted a blue horse”, beautiful book by the way (as all the Eric Carle´s books). I am a big fan of Eric Carle´s, I love all his stories and his way of making art. We came up with the idea to make a stencil of the different parts of the horse, what made the lesson goes way smoother. That was an important part of the success of the lesson. |
Positive, Creative Space.
Archives
December 2023
|


 RSS Feed
